Your website
The Website app gives your business its own website at your workspace address, for example yourname.nalisuite.com, or at your own domain if you have one. You build each page from ready-made sections: a big opening, cards, pictures with text, questions and answers, a contact form and more. Your products, the services customers can book and your job openings fill themselves in from your other apps, so the site is never out of date.
You will find it under Website in the menu.
Note: People who can see the settings can open the website pages. Changing them needs the Manage settings permission (the owner and admin roles by default). Website comes with every plan; switch it off under Settings → Apps if you do not want it.
Until you publish, nothing changes
Your workspace address takes visitors to the sign-in screen, as it always has. It only shows your home page once you publish it, and it goes back to sign-in if you unpublish the page or switch the Website app off.
Create your home page
- Open Website → Pages (marker 1).
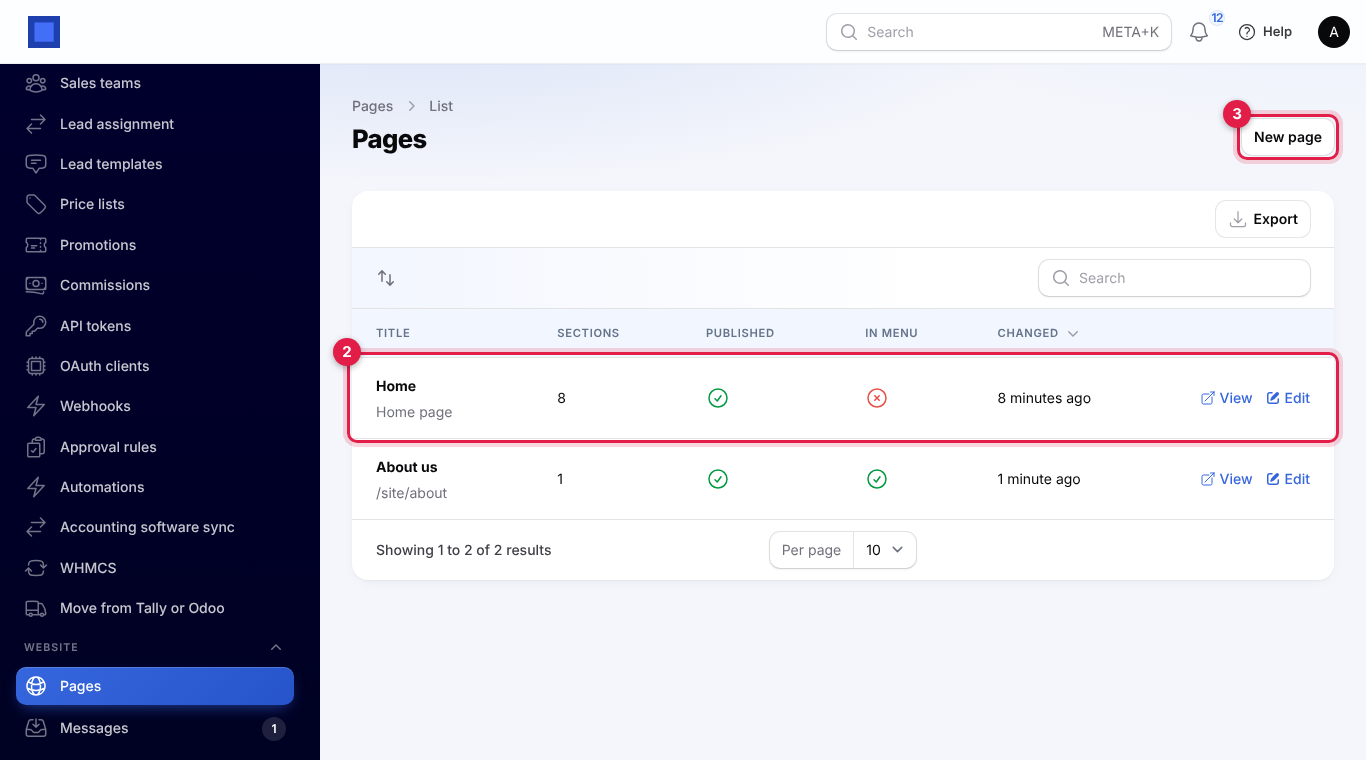
- Press Create your home page. It starts with sections to fill in, chosen from the apps you use: a welcome, why customers choose you, products from your shop, services to book, job openings, questions and a contact form. The home page row then shows in the list (marker 2).
- Press New page (marker 3) for any other page, such as About us or Prices. Other pages live at
/site/followed by their address, and can appear in the top menu.
Edit a page
The page editor has two parts: the page's own settings at the top, and its sections below.
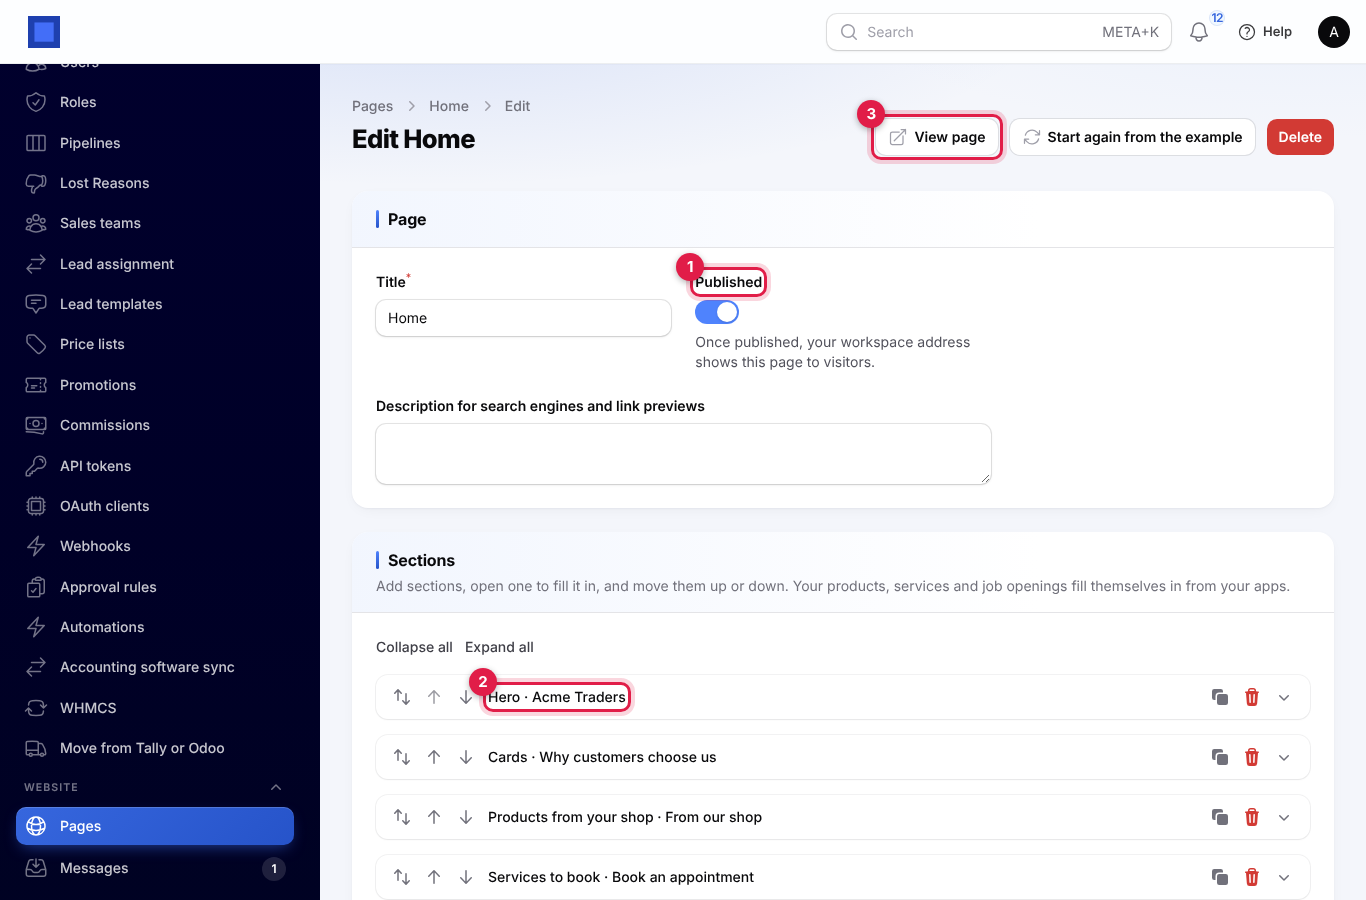
- Published (marker 1) puts the page live. Leave it off while you work, and use Preview to see the draft.
- Each section has a bar (marker 2). Press it to open the section and fill it in. The arrows move it up or down, the copy button duplicates it and the bin removes it.
- View page (marker 3) opens the live page in a new tab.
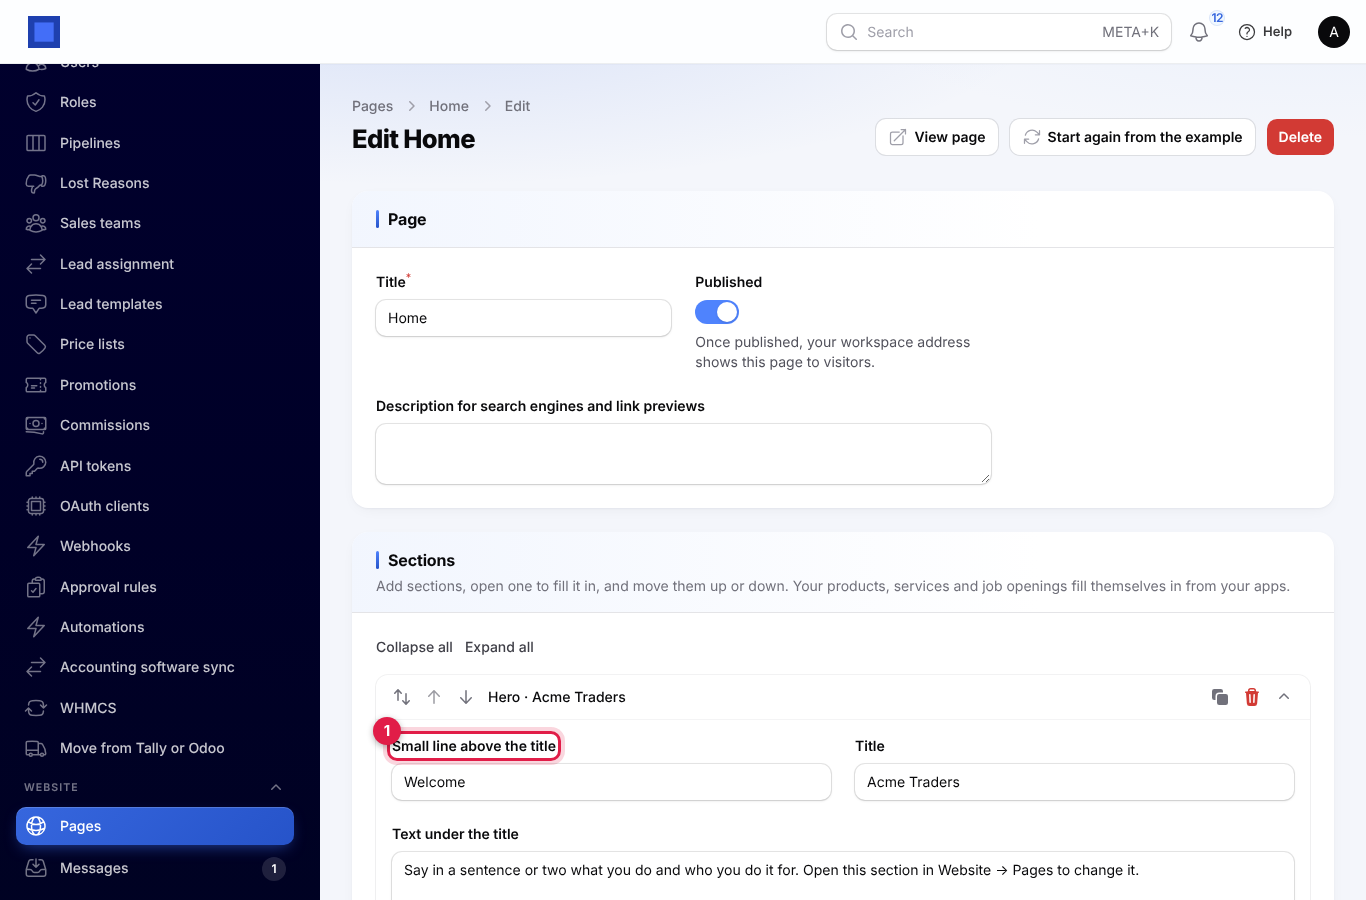
Inside a section you fill in its title (marker 1), text, pictures and buttons. A button's link (marker 2) can be a web address, a section on the same page such as #contact, or {contact} for your contact form.
Every section also has Section options:
- Section name in the address lets links such as
#pricesjump to it. - Show in the top menu as adds it to the menu at the top of every page.
- Background picks white, light, your brand colour or dark.
- Hide this section keeps it out of the page without deleting it.
Press Save changes at the bottom when you are done.
Add a section
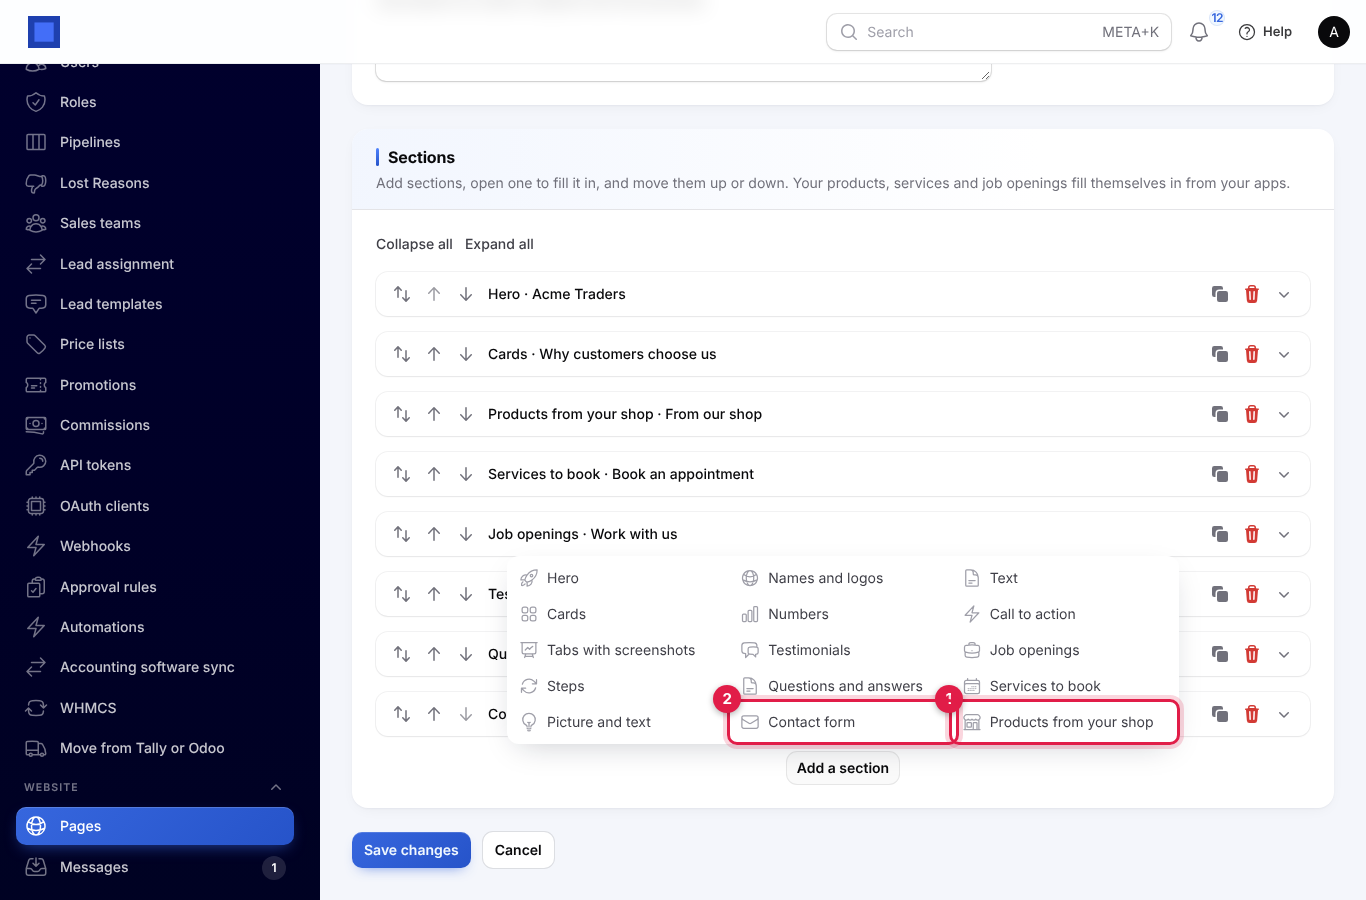
Press Add a section under the last one and pick a kind:
| Section | What it shows |
|---|---|
| Hero | A big title, text, two buttons and a picture, or screenshots visitors flick through |
| Cards | A grid of cards with an icon or a picture |
| Tabs with screenshots | Tabs, each with a title, points and a picture |
| Steps | How it works, as numbered steps |
| Picture and text | An idea or offer beside a picture or a price summary |
| Names and logos | Brands you carry, partners or payment methods |
| Numbers | A row of figures with a label under each |
| Testimonials | Words from customers. Only add quotes customers agreed you can publish |
| Questions and answers | Common questions that open to show the answer |
| Contact form | A form beside your email, phone and address |
| Text | Headings, paragraphs and lists, written in Markdown |
| Call to action | A closing band with a line of text and a button |
| Latest posts | The newest posts from your blog, with their pictures. Hidden until a post is published |
| Portfolio | A gallery of your projects with a picture, the client and a short text, filtered by category |
| Products from your shop (marker 1) | Products on sale in your online shop, with pictures and prices |
| Services to book | Services customers can book online |
| Job openings | Positions open for applications |
Latest posts and Portfolio are explained in Blog and portfolio.
The last three only show while the Online shop, Appointment booking or HR app is switched on. The contact form (marker 2) works with every plan.
What visitors see
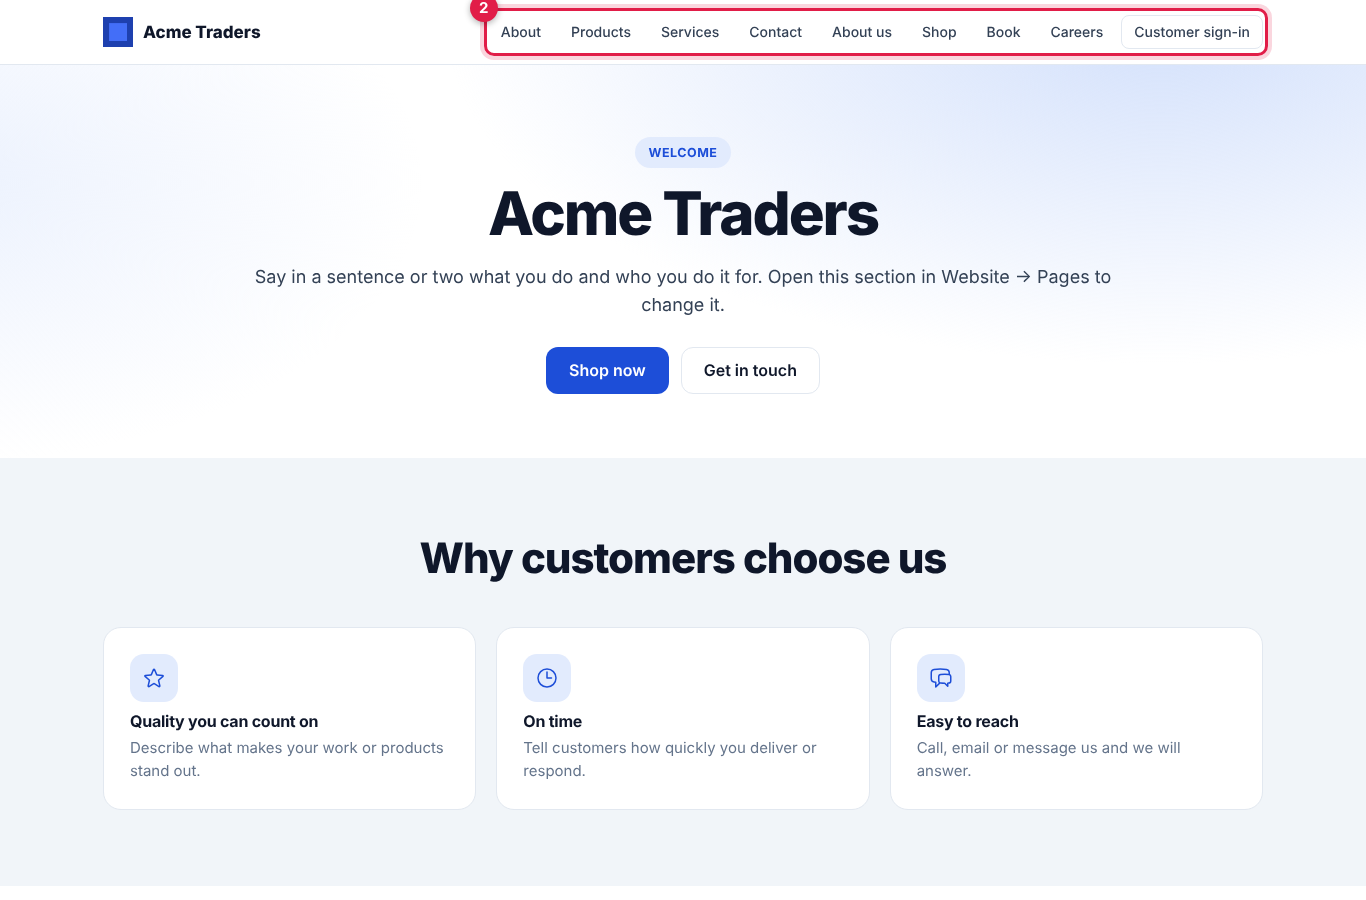
The site uses your logo, name and brand colour from Settings → Appearance. The top menu (marker 2) lists the sections and pages you put in it, then links to your shop, booking page and careers page when those apps are on. Live sections such as your products (marker 1) update as soon as you change the product.
The footer
Every page ends with a footer: your logo and name, a line about your business, your email, phone and address, social links, the pages in your menu, Contact us (when your home page has a contact form) and Customer sign-in (when the customer portal is on), and the copyright line.
Click Footer at the top of the Website pages list to change it:
- About your business: one or two lines under your name, for example what you do and where.
- WhatsApp number: adds a Chat on WhatsApp link.
- Social links: a name and a web address for each network. Facebook, Instagram, X, LinkedIn, YouTube and TikTok show their icon; others show their first letter. Addresses must start with
https://.
The email, phone and address come from your default company under Settings → Companies. If you upload a dark logo under Preferences → Appearance, the footer uses it.
Messages
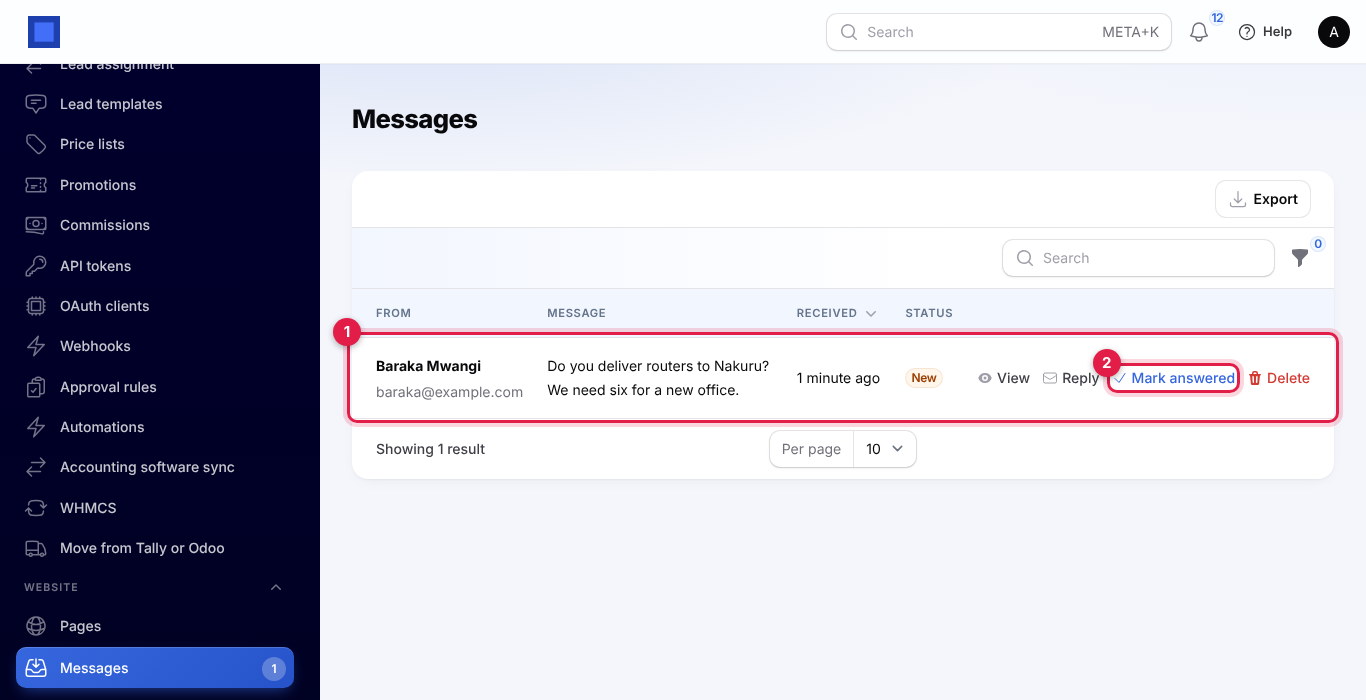
Messages sent from a contact section arrive under Website → Messages:
- each message is listed with who sent it and when (marker 1);
- Reply opens your email program;
- Mark answered (marker 2) files the message away.
When the CRM app is on, every message also becomes a lead in your pipeline, with the source Website. People with Manage settings get an alert for each new message. Choose how you hear about them under your initial at the top right → Notification settings → Website messages.
Questions
Can I use my own domain? Yes. Ask for a custom domain under Settings → Domains. Once it is connected, your website shows there too.
Do my shop, booking and careers pages change? No, they keep their own pages and their own introductions in Settings. The website links to them and shows their products, services and openings.
Can I start again? On the home page, Start again from the example puts back the starting sections. It replaces every section on the page, so use it with care.