Blog and portfolio
Write news, tips and offers for your customers and publish them on your website's blog. Each post can have a cover picture and tags, and you can schedule one to go live on a later date. Two page sections then put your work in front of visitors: Latest posts shows your newest posts on any page, and Portfolio shows a gallery of projects that visitors filter by category.
You will find the blog under Website → Blog in the menu. The two sections are added in the page editor under Website → Pages.
Note: The blog is part of the Website app, which comes with every plan (see Your website). People who can see the settings can open the list of posts. Writing, changing and deleting posts needs the Manage settings permission (the owner and admin roles by default).
Write a post
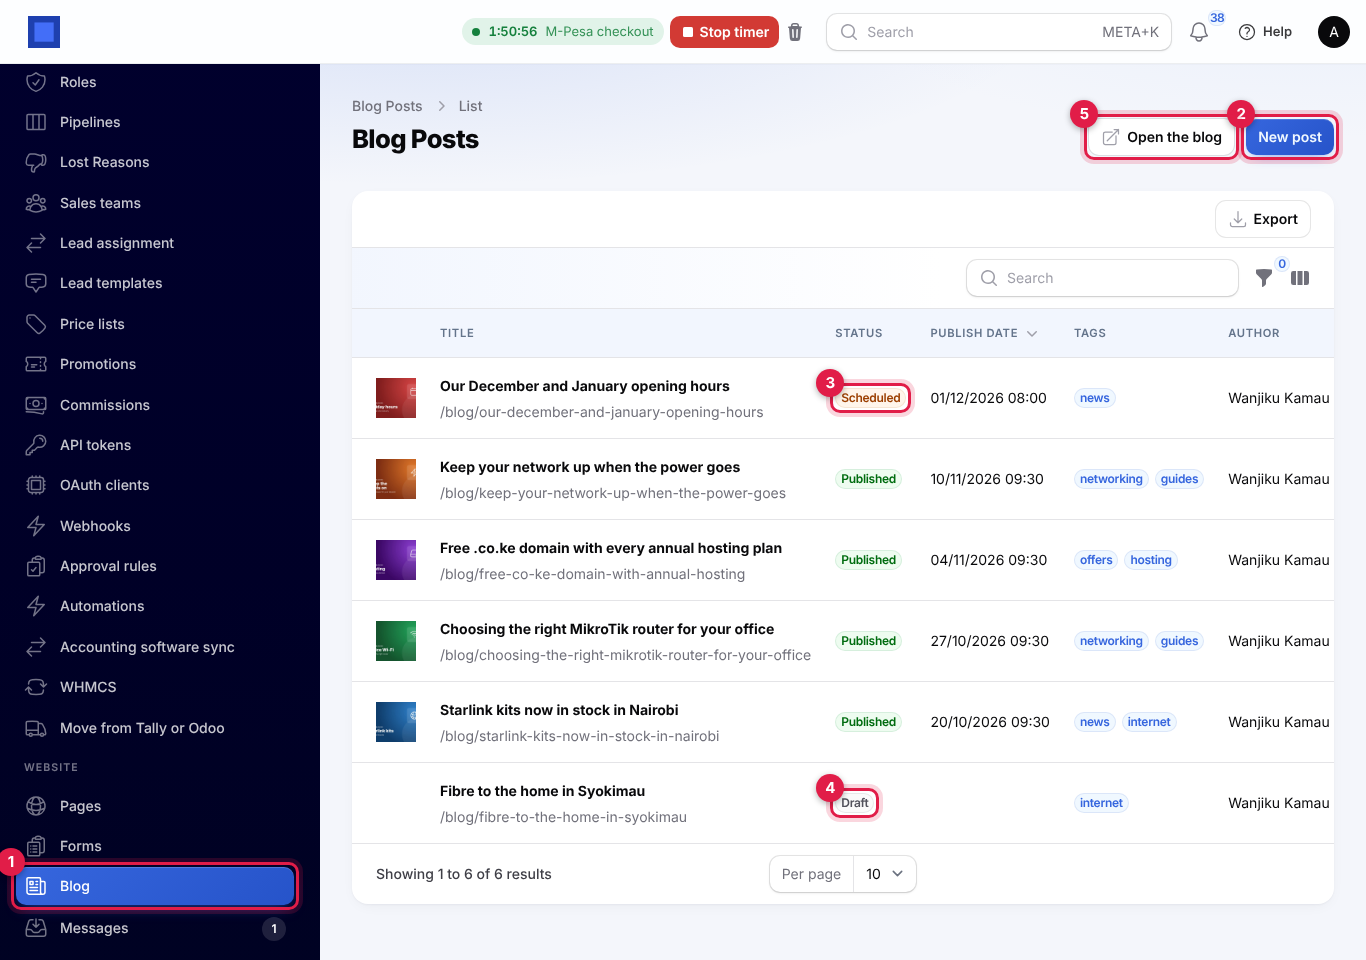
- Open Website → Blog (marker 1). Each post shows its cover, title and address, whether it is a draft, scheduled or published (markers 3 and 4), its publish date, tags and author.
- Press New post (marker 2).
- Fill in the post and press Create. The post opens again so you can carry on working on it.
Open the blog (marker 5) opens your public blog in a new tab. You can filter the list by status, and search it by title.
The post form has three parts.
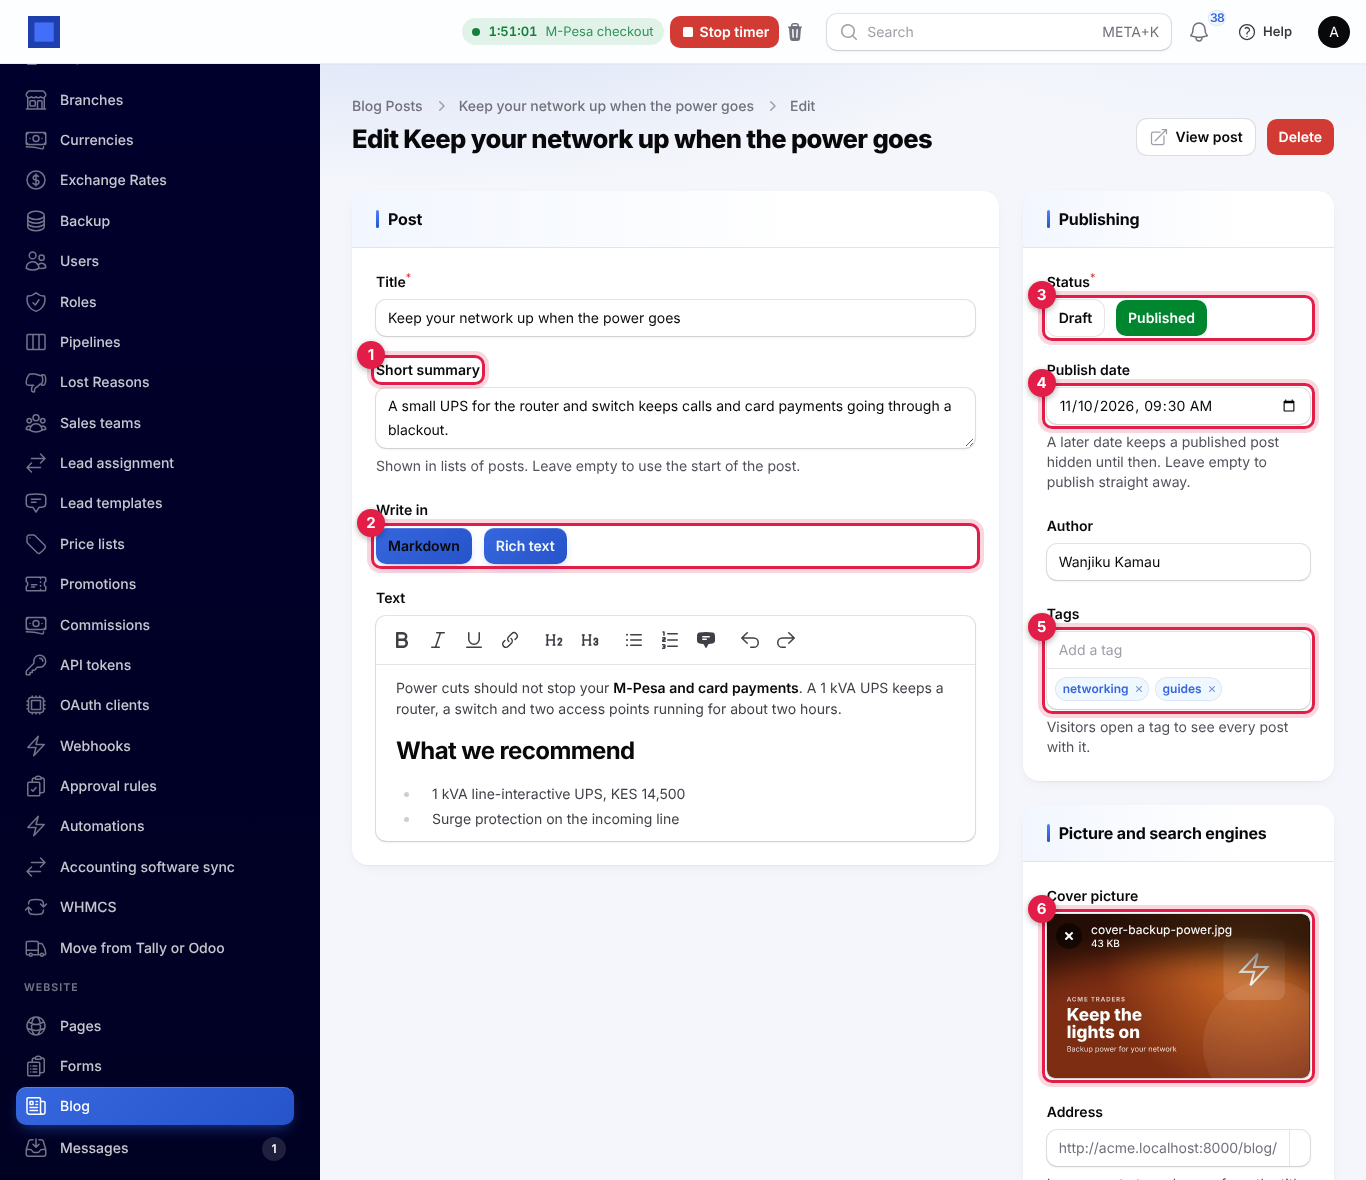
Post
- Title: the post's heading.
- Short summary (marker 1): shown under the title in lists of posts and in the feed. Leave it empty to use the start of the post.
- Write in (marker 2): Markdown or Rich text. Markdown is plain text with simple marks, such as
**bold**and## Heading. Rich text has buttons for bold, italic, underline, links, headings, lists and quotes. Choose before you start writing: the text box changes with it. - Text: the post itself.
Publishing
- Status (marker 3): Draft or Published.
- Publish date (marker 4): when the post goes live. See Drafts and scheduled posts.
- Author: your name to start with. Change it to whoever wrote the post.
- Tags (marker 5): type a tag and press Enter. See Tags.
Picture and search engines
- Cover picture (marker 6): shown on the post's card, at the top of the post, and when someone shares the link. Up to 4 MB.
- Address: the end of the post's web address, after
/blog/. Leave it empty to make one from the title. Use letters, numbers and dashes; two posts cannot share an address. - Description for search engines and link previews: the line Google and chat apps show under the title. Leave it empty to use the short summary.
View post at the top of the form opens the live post. It only shows once the post is published and its date has come.
Drafts and scheduled posts
A post shows on your website only when its status is Published and its publish date has come.
| You set | The list shows | Visitors see |
|---|---|---|
| Draft | Draft | Nothing. The post's address shows "not found" |
| Published, no date | Published | The post straight away. Today's date and time are filled in for you |
| Published, a past date | Published | The post, dated that day |
| Published, a later date | Scheduled | Nothing until that date and time, then the post appears by itself |
To take a post down, set it back to Draft. Deleting a post removes it for good.
Tags
Tags group posts on the same subject, such as offers or guides.
- They are saved in lower case, so "News" and "news" are the same tag.
- A post can have up to 12 tags.
- Visitors open a tag to see every post with it, at
/blog/tag/followed by the tag. - The Latest posts section can show only the posts with one tag.
What visitors see
Your blog lives at /blog on your workspace address, or on your own domain. It uses your logo, name and brand colour, with the same top menu as your website.
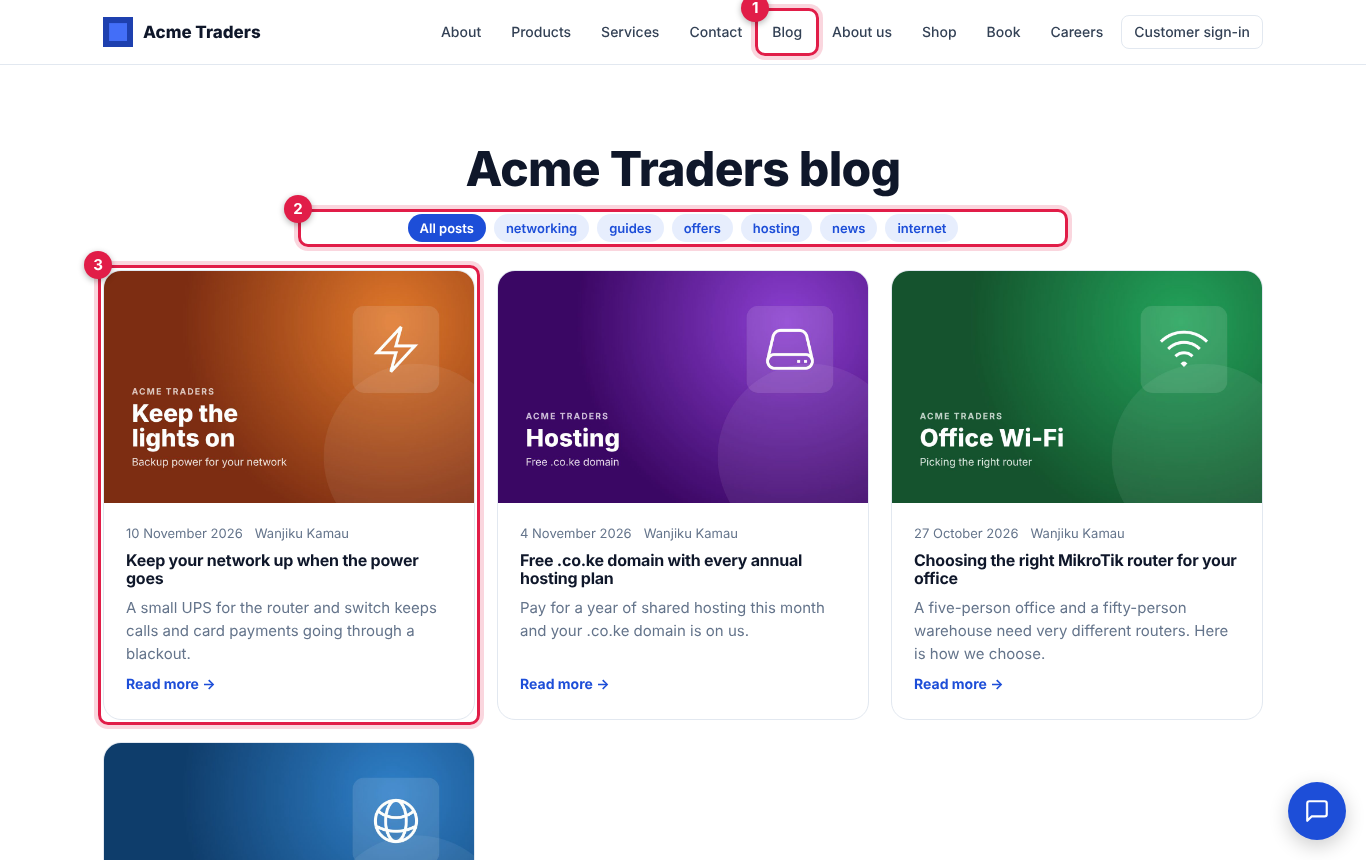
- Blog appears in the top menu (marker 1) as soon as one post is published. It goes away again if no post is live.
- The tags (marker 2) sit under the title, the most used first. All posts shows everything again.
- Each post is a card (marker 3) with its cover, date, author, title and summary. Nine posts show per page, newest first, with Older posts and Newer posts to move between pages.
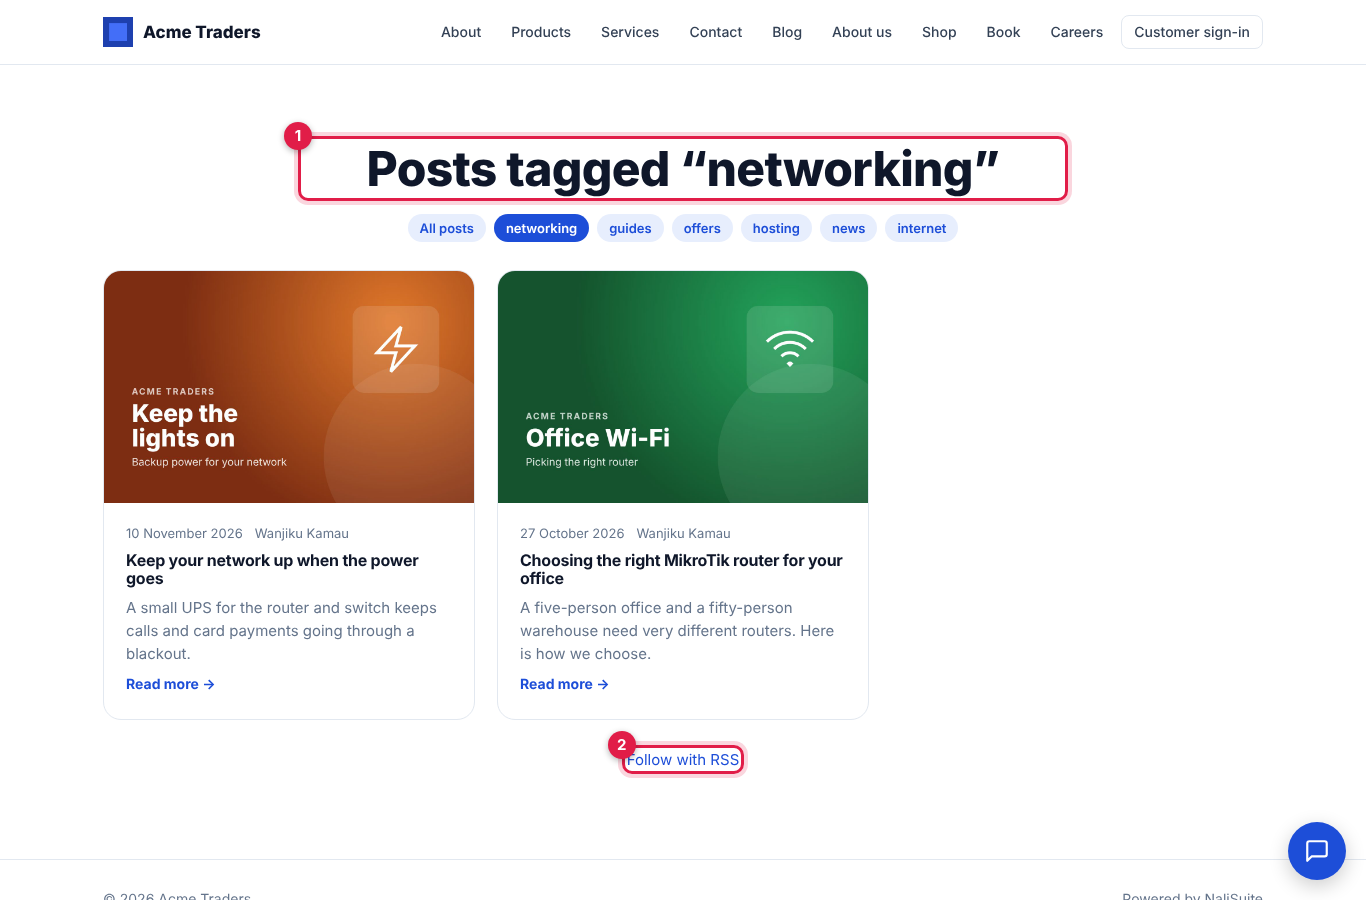
A tag page says which tag it shows (marker 1). At the bottom of every list, Follow with RSS (marker 2) gives the address of your blog's feed (/blog/feed.xml), with your 20 newest posts, for people who follow blogs in a news reader.
Each post has its own page with its date, author, summary, cover picture and text, the post's tags and a link back to All posts.
Add your latest posts to a page
The Latest posts section shows your newest posts on any page of your website, such as the home page.
- Open Website → Pages and open the page.
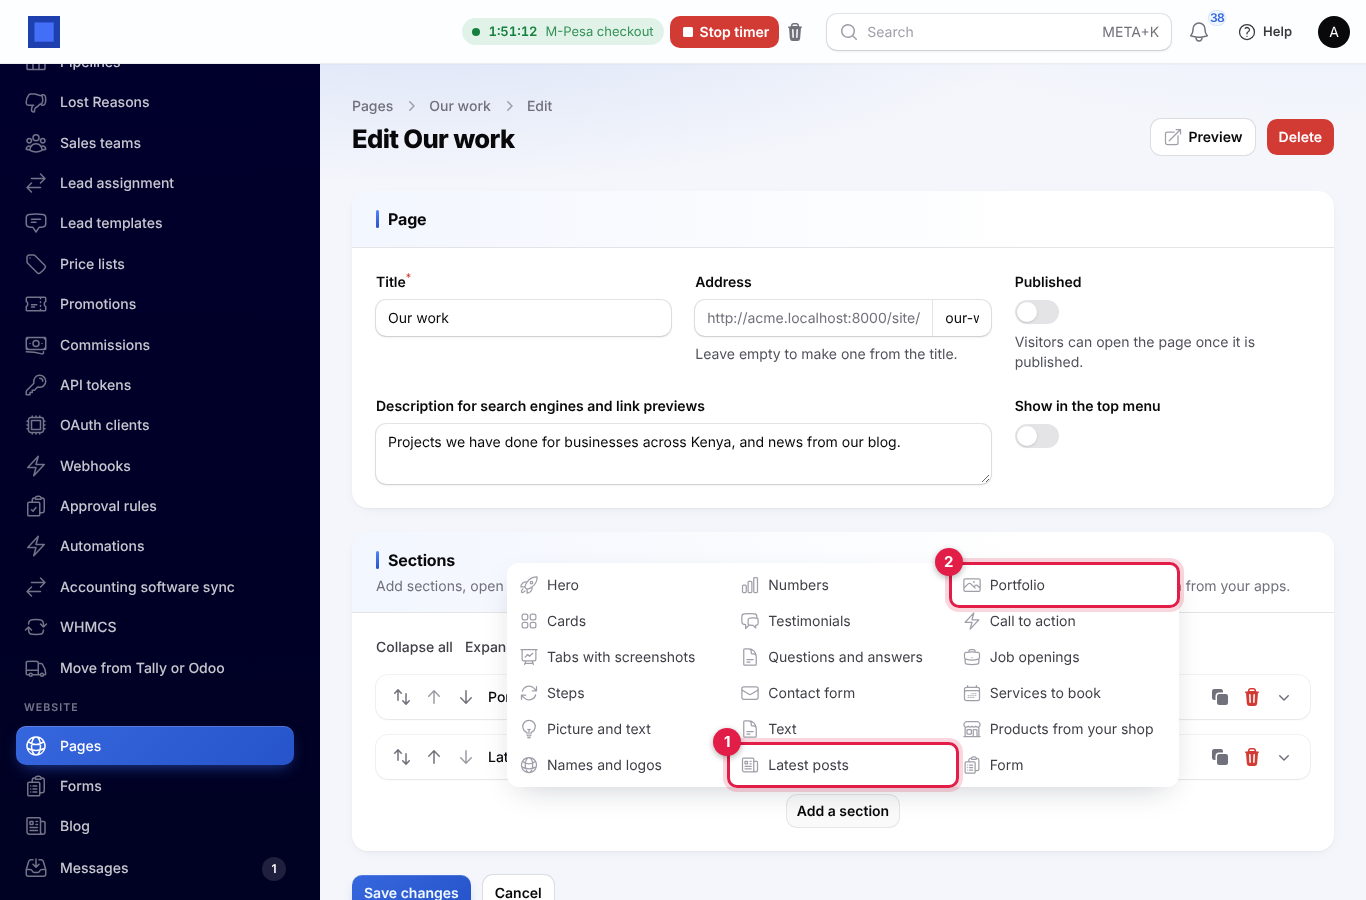
- Press Add a section and pick Latest posts (marker 1). Portfolio (marker 2) is next to it.
- Open the section and fill it in, then press Save changes.
The section's settings:
- Small line above the title, Title (marker 1) and Text under the title.
- How many posts: 3 to start with, up to 12.
- Only posts with this tag: leave it empty for every post.
- Show the pictures: switch off to show the cards without their covers.
- Button text: a button under the posts that opens the whole blog (marker 2). Leave it empty to leave the button out.
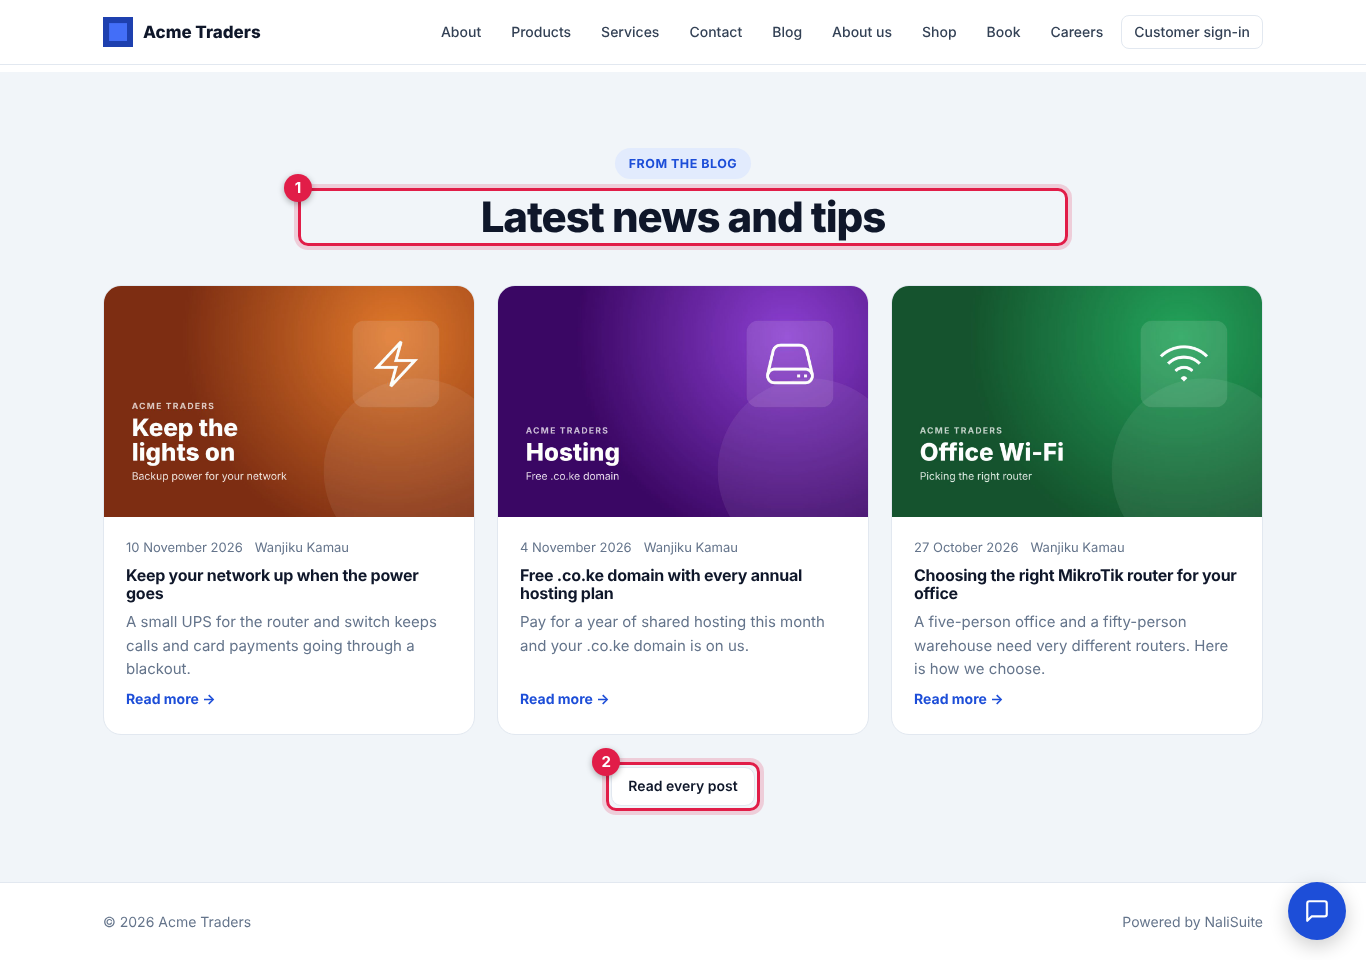
The section stays hidden while there is no published post (or none with its tag), so you can add it before your first post.
Show your work in a portfolio
The Portfolio section is a gallery of projects you have done, each with a picture, the client's name and a short text. Visitors filter it by category.
- Open the page in Website → Pages, press Add a section and pick Portfolio.
- Open the section. Fill in its title and text, then choose:
- Projects per row (marker 1): two, three or four.
- Let visitors filter by category (marker 2): on to start with.
- Name of the "show everything" button: for example All projects. Leave it empty for All.
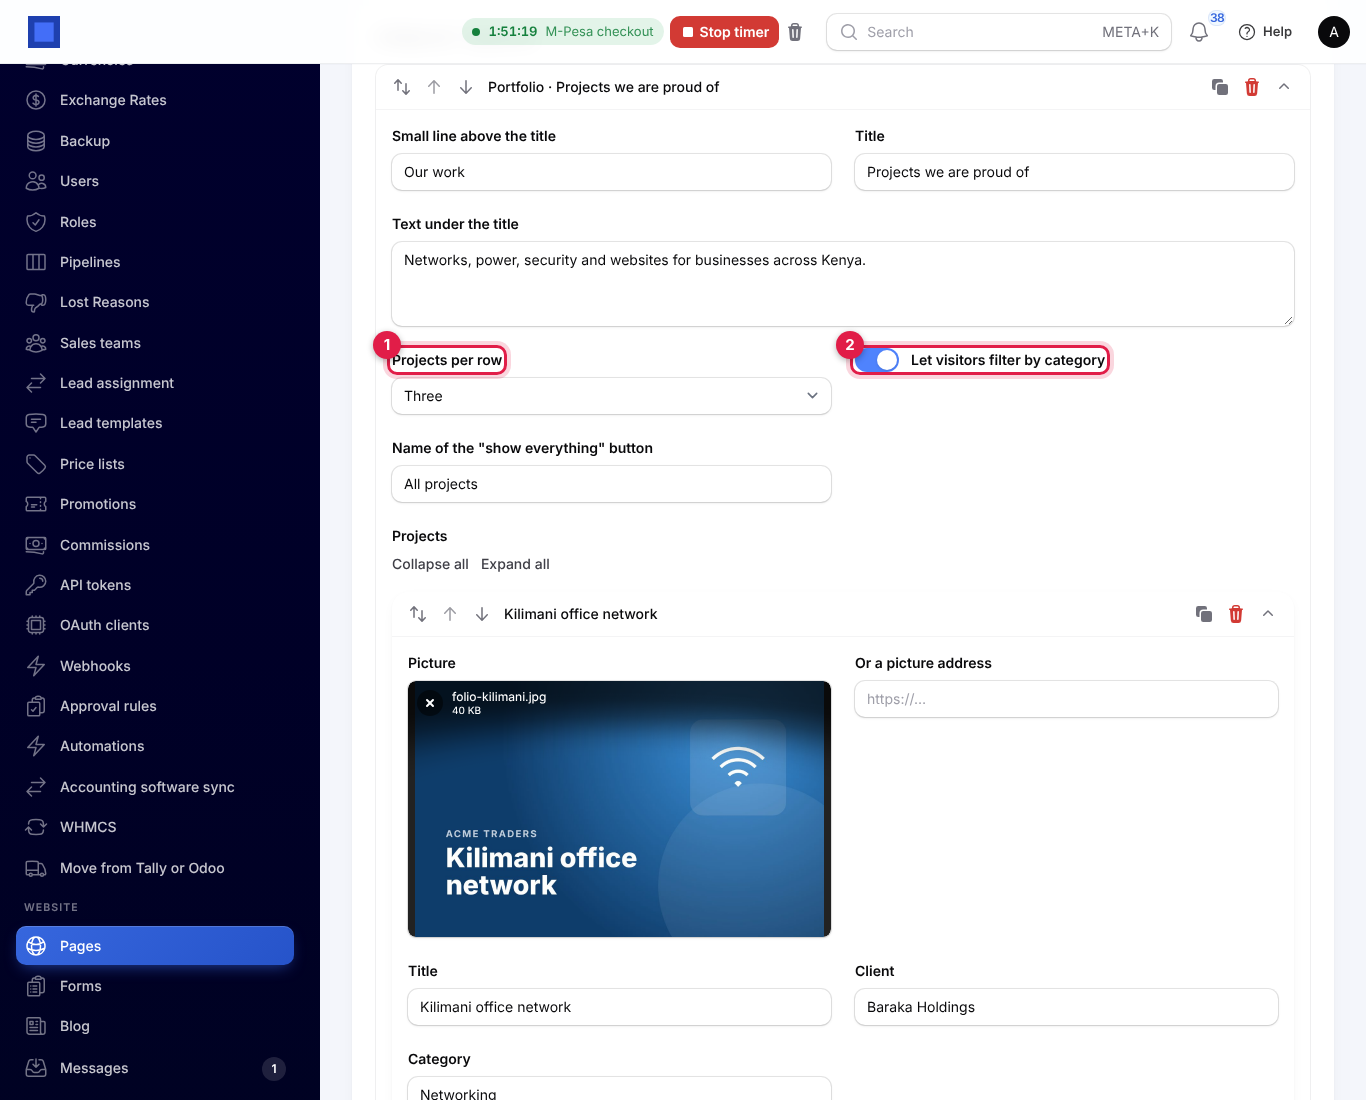
- Under Projects, press Add for each project and fill in:
- Picture, or Or a picture address for a picture already online.
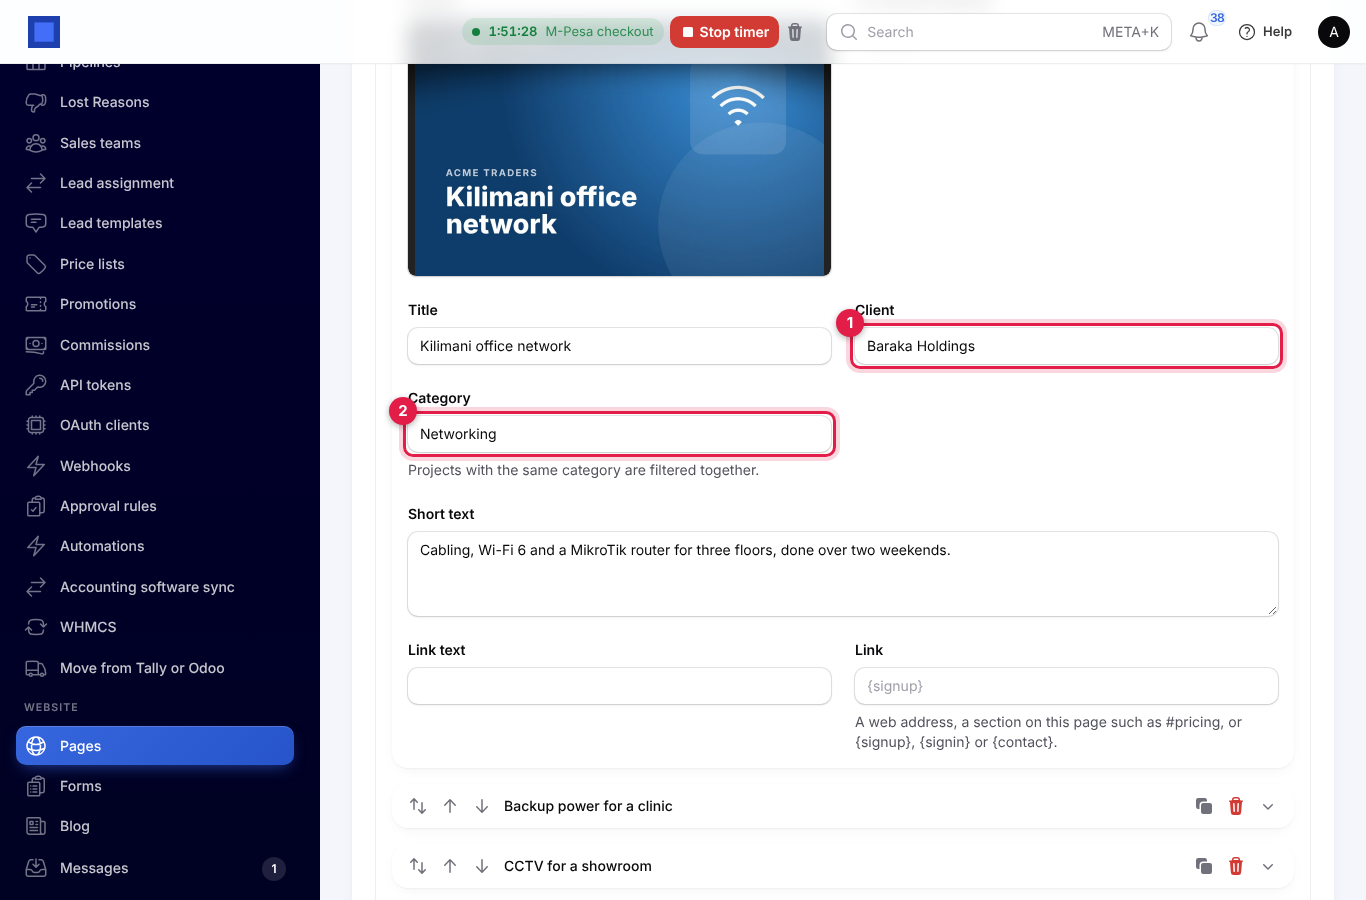
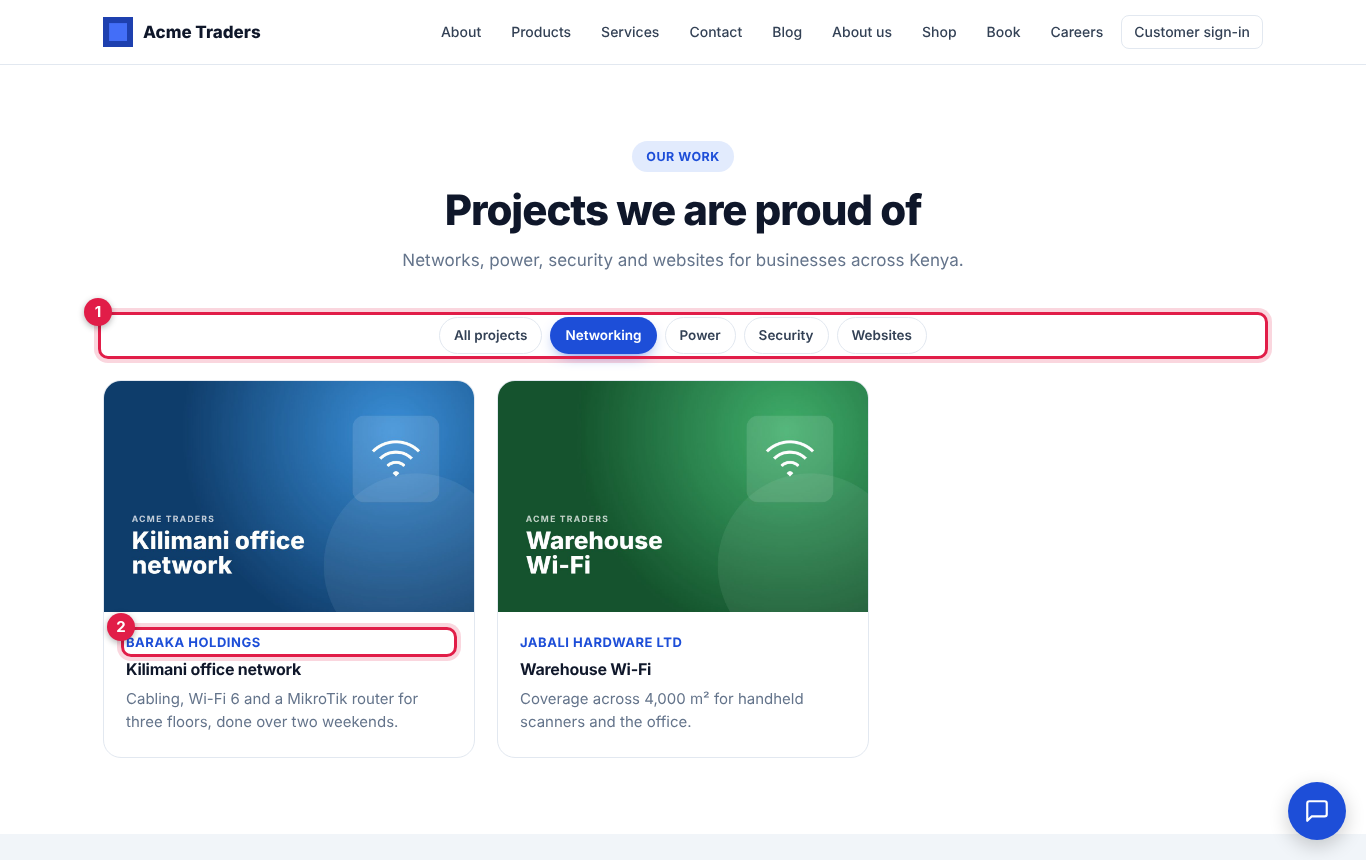
- Title, Client (marker 1) and Short text.
- Category (marker 2), such as Networking or Websites. Projects with the same category are filtered together, so spell it the same way each time.
- Link text and Link, to point to a case study or the client's site. The link text is See the project if you leave it empty.
- Use the arrows on a project's bar to change the order, then press Save changes.
On the page, the category buttons (marker 1) appear above the projects. Pressing one shows only that category's projects; the first button shows them all again. Each project shows its client (marker 2), title and text.
For the platform team
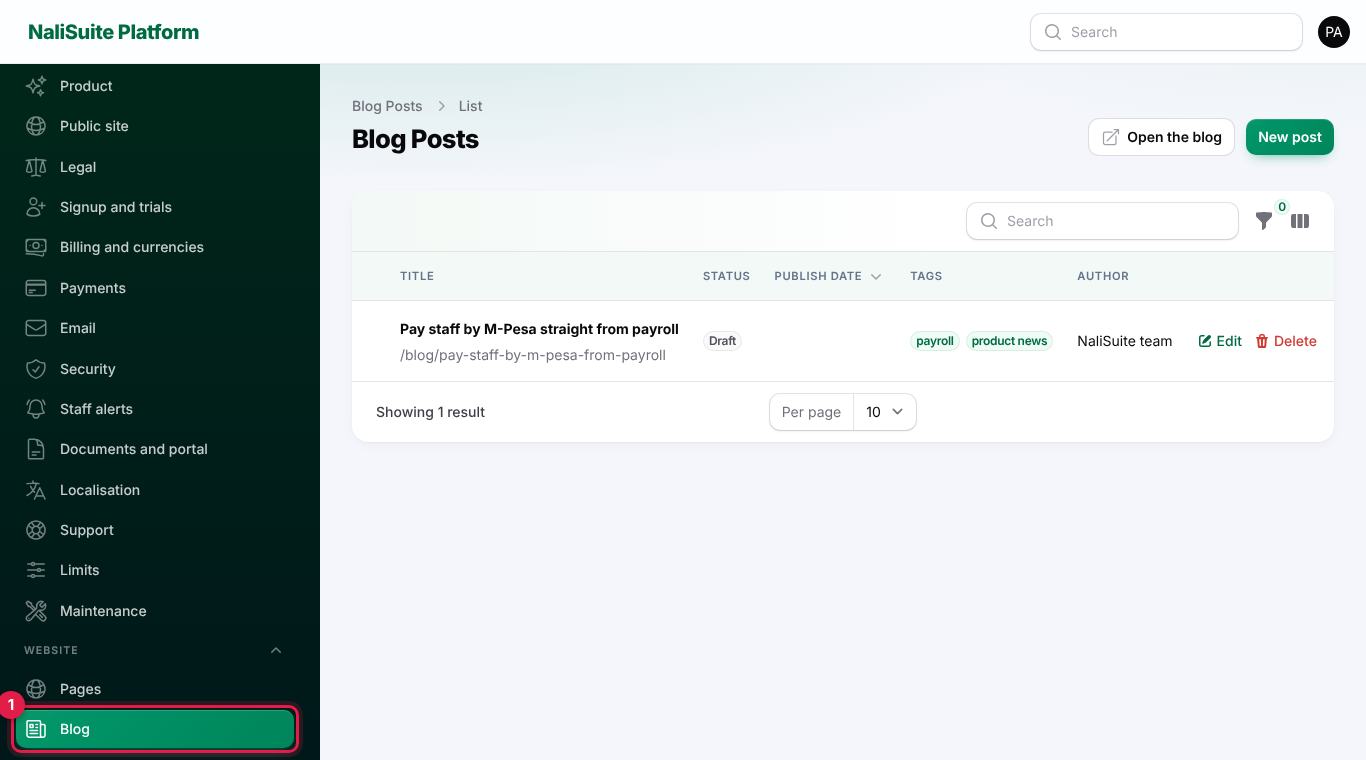
Platform staff have the same blog for the NaliSuite website, under Website → Blog in the staff panel (marker 1). It has the same post form, drafts, scheduling, tags and RSS feed, and its posts show at /blog on the platform's own address. The Latest posts and Portfolio sections can be added to the platform's pages too.
Good to know
- Where the menu link comes from: you do not add Blog to the menu yourself. It appears once a post is live and sits after the sections you named for the menu.
- Scheduling checks the clock when someone visits. A scheduled post appears at its time without anyone pressing a button.
- Markdown posts are safe to paste into. Any web code pasted into a Markdown post is removed, and rich text is cleaned before it is shown.
- Empty sections stay out of the way. A Portfolio with no projects, or a Latest posts section with no posts, is left out of the page.
- A portfolio needs two categories to show a filter. With one category, or none, the buttons are left out.
- Limits: up to 12 tags a post, 500 characters for the short summary, 4 MB for each picture, 12 posts in a Latest posts section and 48 projects in a portfolio.