Field service
The Field Service app runs jobs at customers' sites: air-conditioning services, generator installations, CCTV maintenance, solar, plumbing, IT support. The office creates a job (or turns a support ticket into one), schedules it to a technician on the dispatch board, and the technician works from their phone: they start the job, tick the checklist, add the parts they used and photos, and get the customer's signature on the screen. Back in the office, one click invoices labour and parts. Everything is under Field Service in the left menu (Dispatch board, Jobs, Job types); technicians use Me → My jobs.
Switch the Field Service app on
Field Service is an add-on sold separately from your plan.
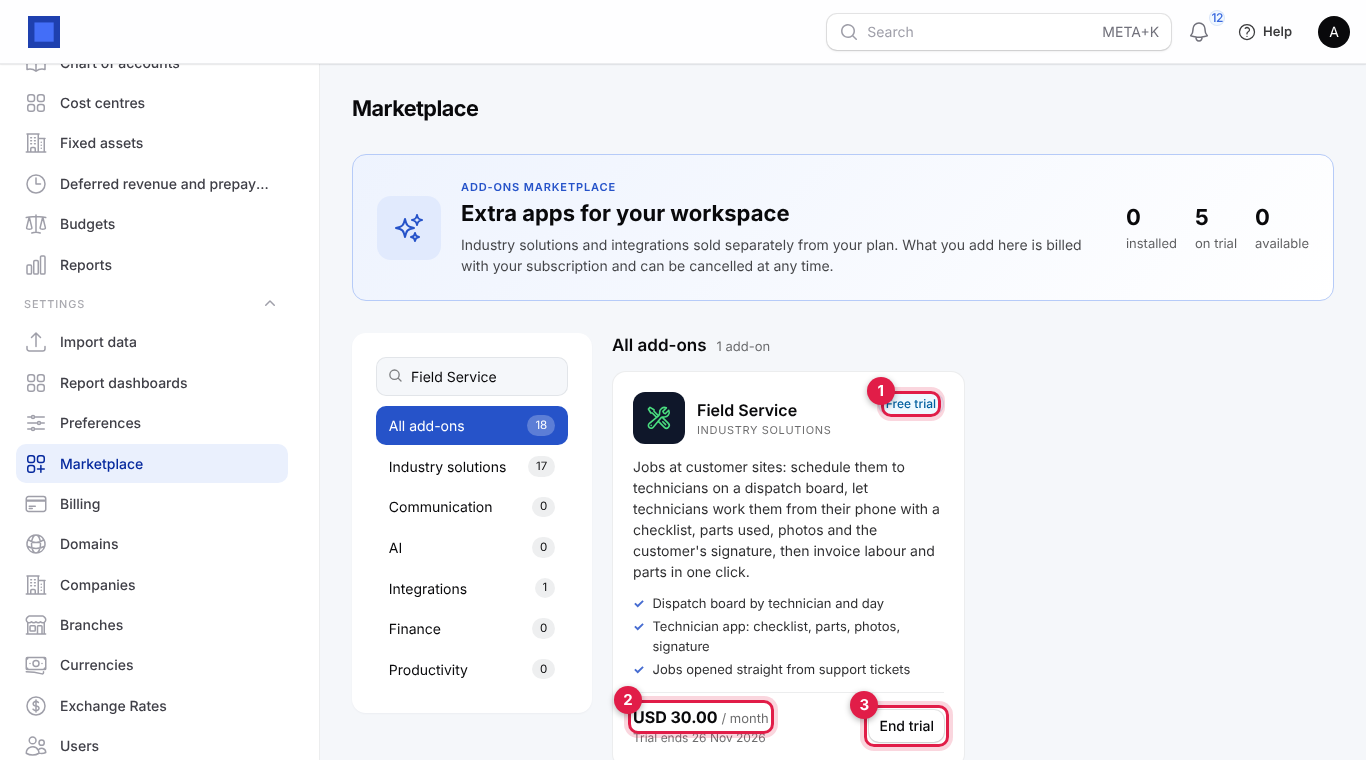
- Open Settings → Marketplace and find Field Service in Industry solutions (or type it in the search box). The card shows what it does and its monthly price (marker 2).
- Click Start free trial (or Add to subscription) and confirm. During a trial the card shows Free trial and the end date (marker 1). The Field Service menu appears straight away.
- End trial (marker 3) or Cancel switches it off; your jobs are kept.
Permissions (set under Settings → Roles): fieldservice.view (see jobs; also what makes a user appear as a technician in the pickers and on the dispatch board), fieldservice.dispatch (schedule from the dispatch board), fieldservice.manage (create, edit, complete, invoice and cancel jobs; manage job types). Give technicians a role with fieldservice.view only.
Set the defaults
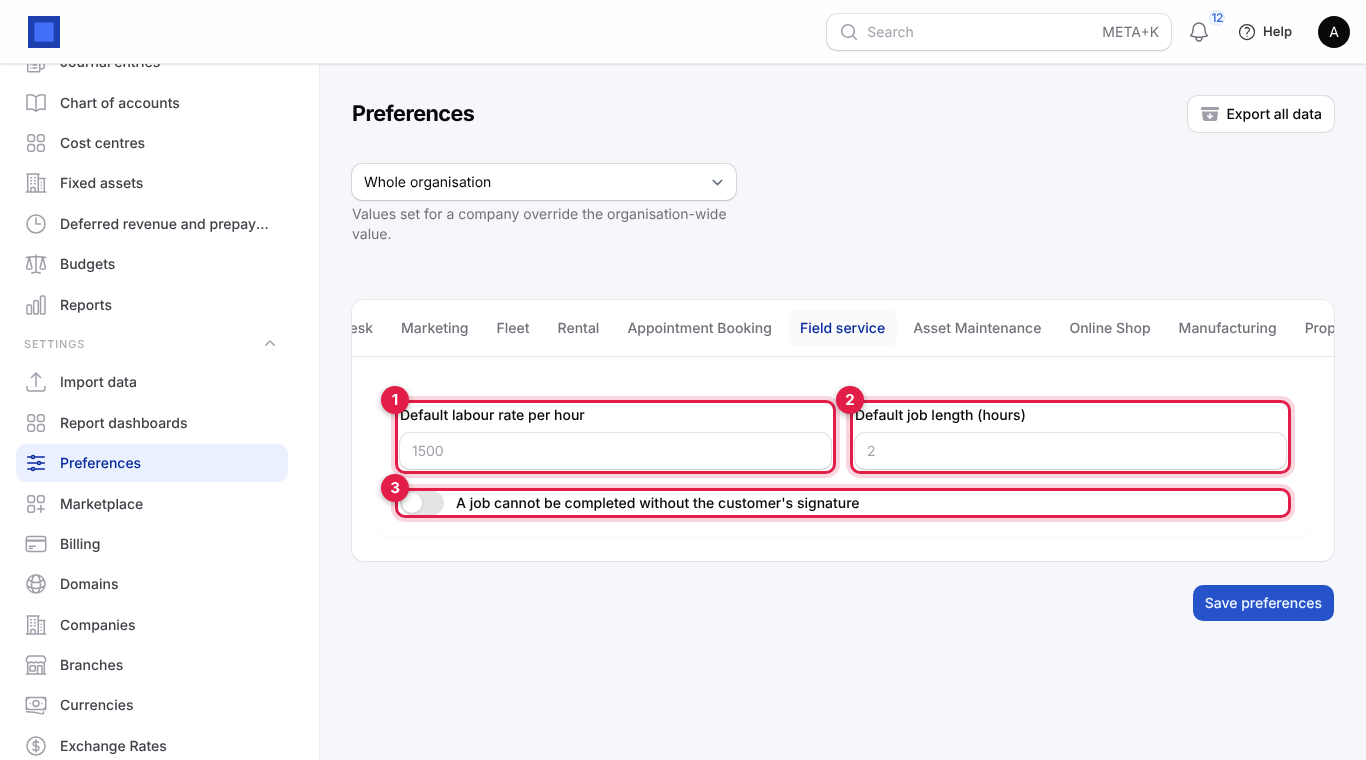
Open Settings → Preferences, click the Field service tab, set these and click Save preferences.
| Setting | What it does |
|---|---|
| Default labour rate per hour (marker 1) | Used on new jobs and job types without their own rate, for example 1500. |
| Default job length (hours) (marker 2) | The expected duration filled in when scheduling, for example 2. |
| A job cannot be completed without the customer's signature (marker 3) | When on, technicians must get a signature on My jobs before Complete job works, and the office Complete button is refused. |
Set up job types
Job types are templates for the jobs you do often: they carry a checklist of steps, the usual duration and the labour rate.
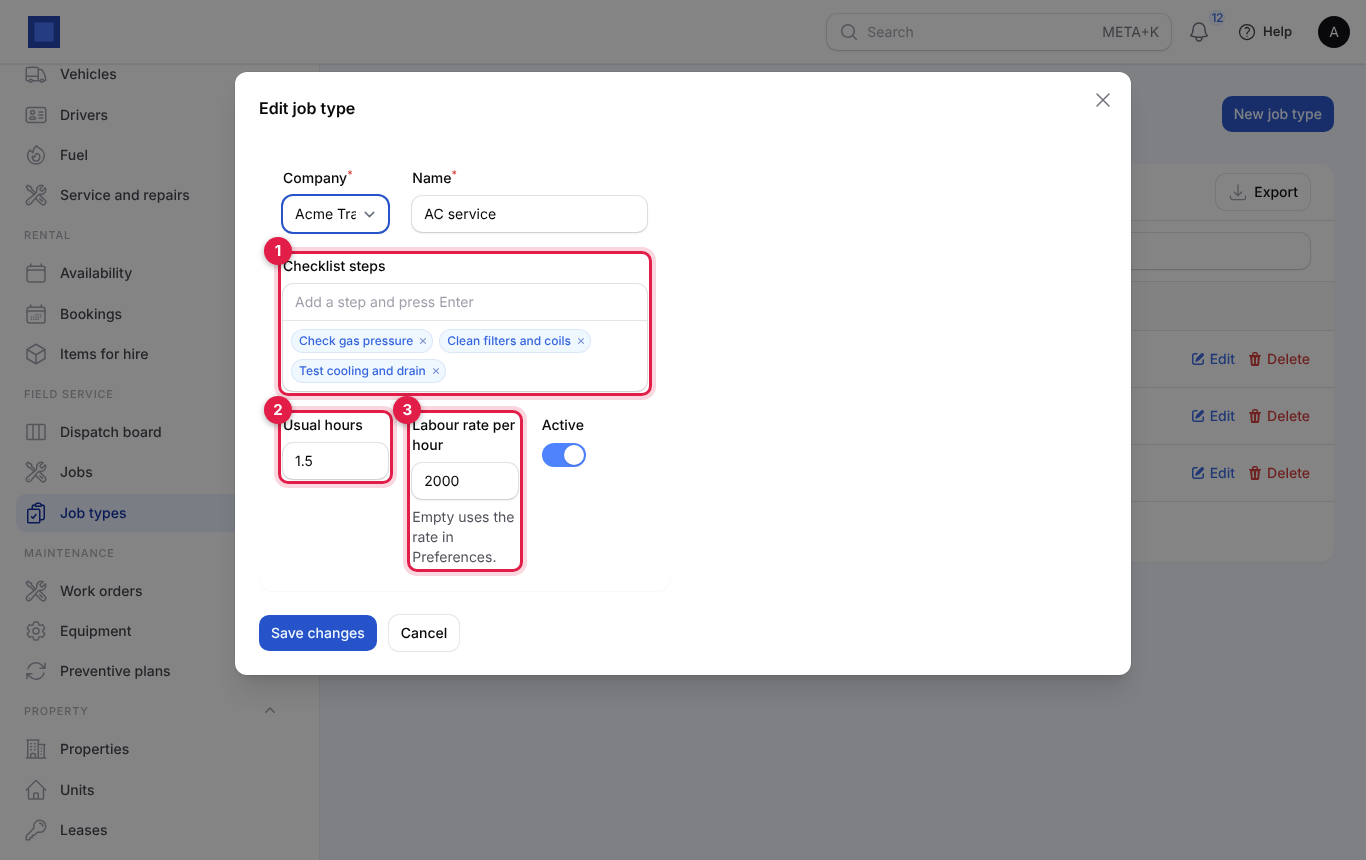
- Open Field Service → Job types and click New job type, or Edit on an existing one.
| Field | What to enter |
|---|---|
| Company (required), Name (required) | For example AC service, Generator installation. |
| Checklist steps (marker 1) | Type a step and press Enter, for example Check gas pressure, Clean filters and coils, Test cooling and drain. Each step is copied onto every job of this type. |
| Usual hours (marker 2) | Typical duration, in quarter hours (1.5). |
| Labour rate per hour (marker 3) | Leave empty to use the rate in Preferences. |
| Active | Switch off to hide the type from new jobs. |
- Click Create (or Save changes). The list shows the number of steps, hours and rate per type.
Create a job
- Open Field Service → Jobs. The list shows each job's number, title with the site or customer, technician (Unassigned if none), scheduled time (marker 2; red when overdue), priority, total and status (marker 3). Filter by Status, Technician or Priority.
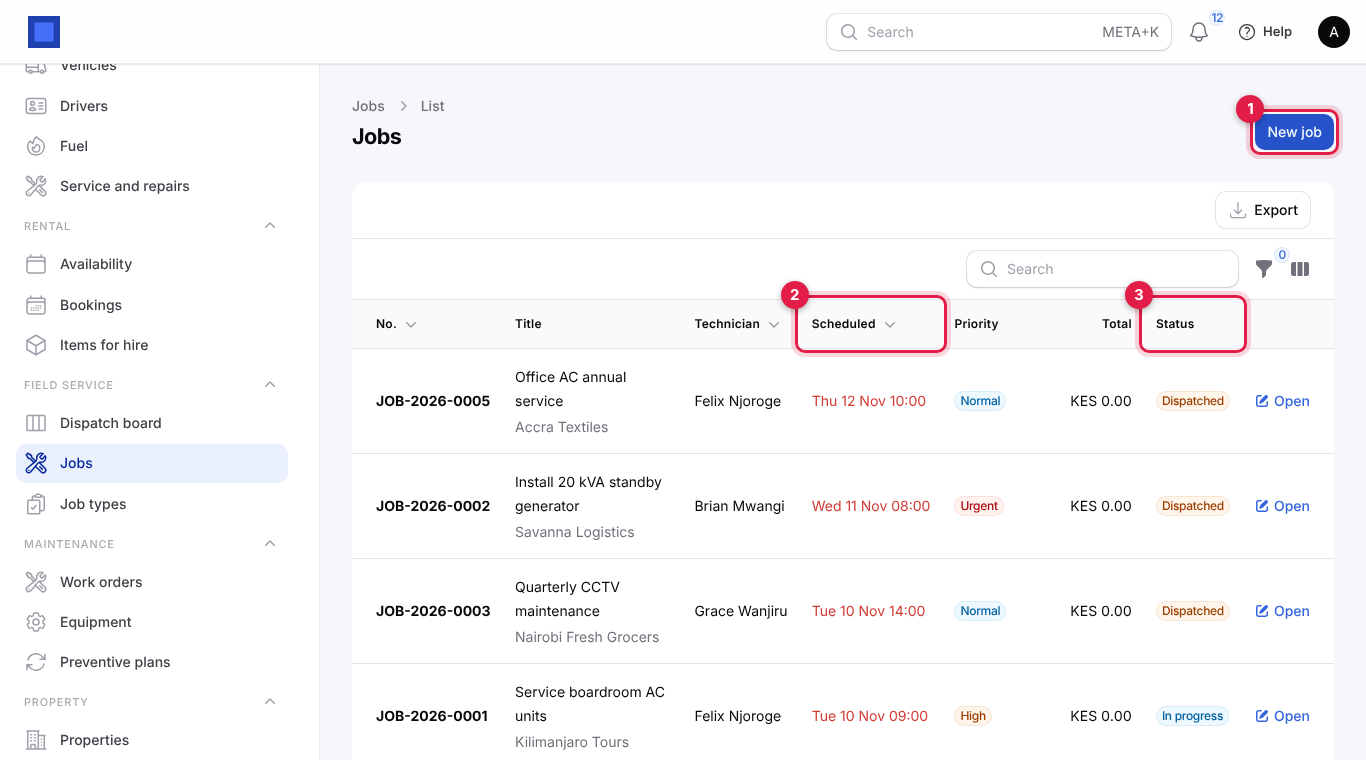
- Click New job (marker 1).
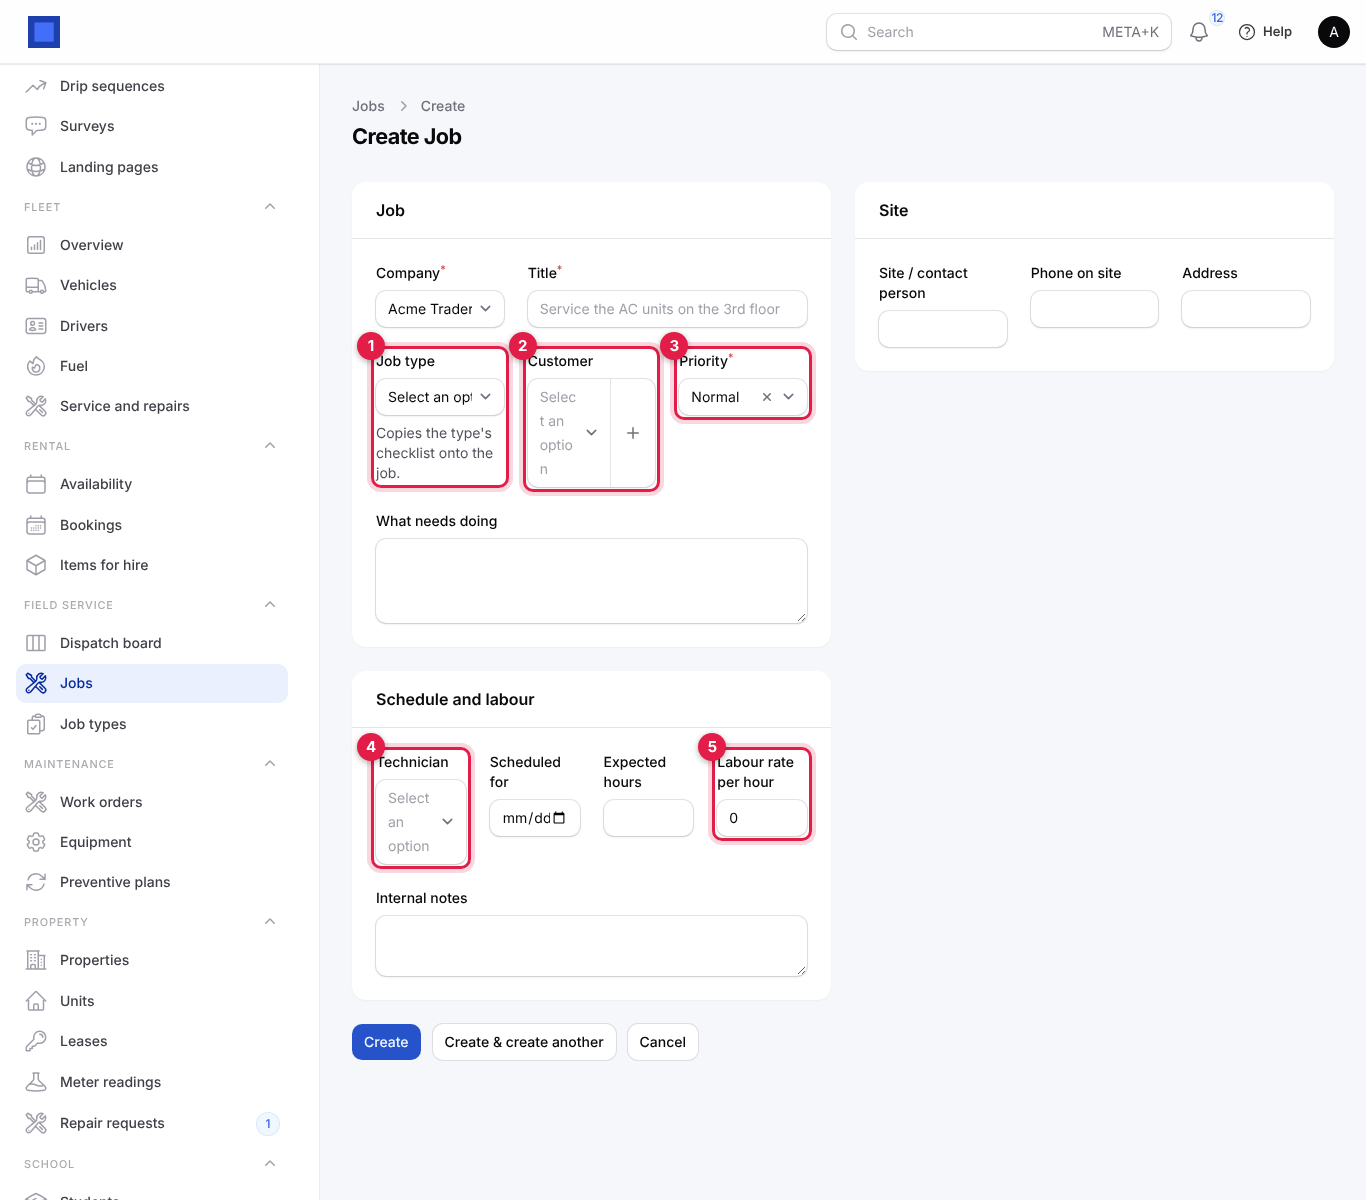
| Field | What to enter |
|---|---|
| Company (required) | Your company doing the work. |
| Title (required) | What is to be done, for example Service the AC units on the 3rd floor. |
| Job type (marker 1) | Copies the type's checklist, hours and rate onto the job. |
| Customer (marker 2) | The contact to invoice. Picking one fills in the site address and phone. Needed before invoicing. |
| Priority (required, marker 3) | Low, Normal, High or Urgent. Urgent jobs get an amber edge on the dispatch board. |
| What needs doing | The details the technician reads on site. |
| Site / contact person, Phone on site, Address | Who to ask for and where. The technician can tap the phone number to call. |
| Technician (marker 4) | Who does it. Can be left empty and set when scheduling. |
| Scheduled for | Date and time. |
| Expected hours | How long it should take. |
| Labour rate per hour (marker 5) | Charged on the invoice for each hour worked. |
| Internal notes | For the office; not printed. |
- Click Create. The job gets a number (JOB-2026-0007) and the status New (or Scheduled when you gave a technician and time).
From a support ticket
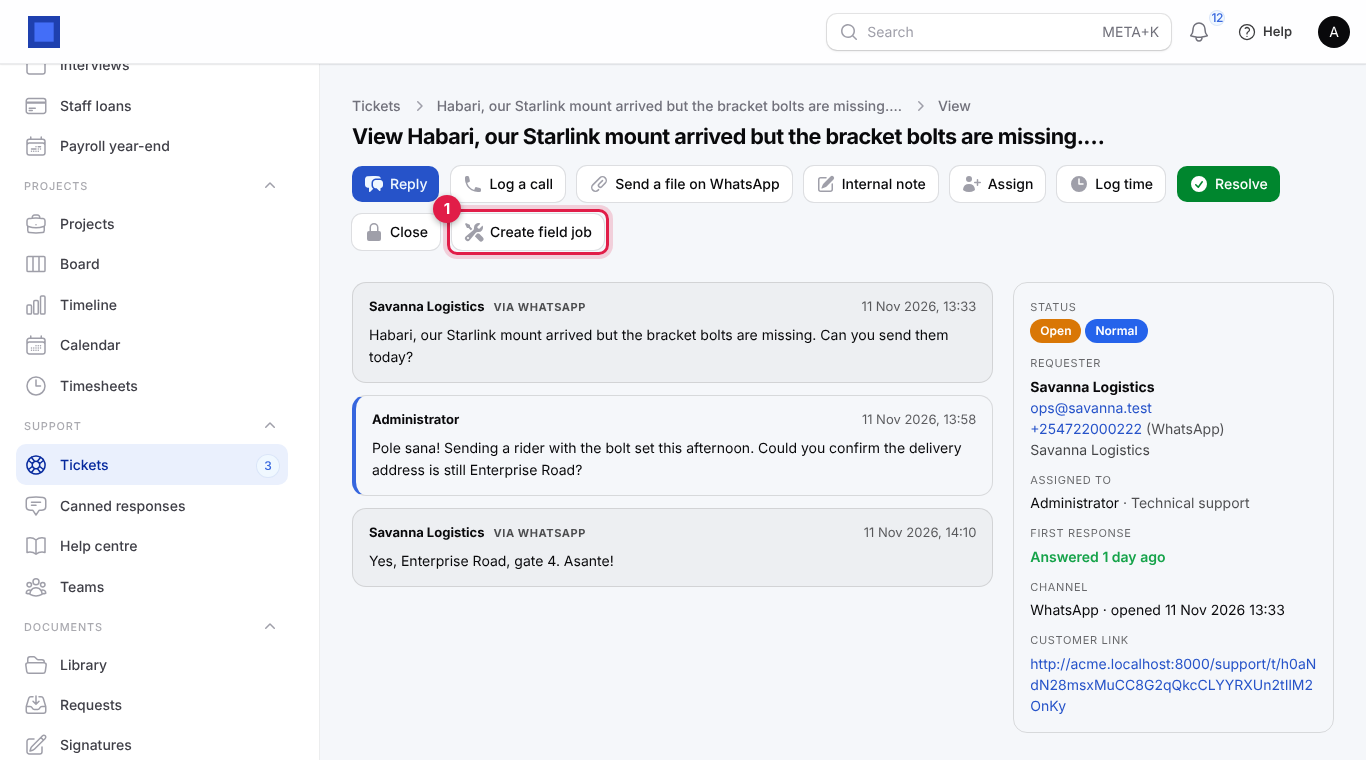
When a customer reports a fault through the Helpdesk, open the ticket and click Create field job (marker 1). Edit the Title, pick a Job type and click Submit. The job is created for the ticket's customer and opens, ready to schedule.
Schedule and dispatch
From the job
- Open a New job. Its header shows Schedule (marker 1), Job sheet PDF (marker 2) and Cancel job (marker 3); Delete is available only while the job is New.
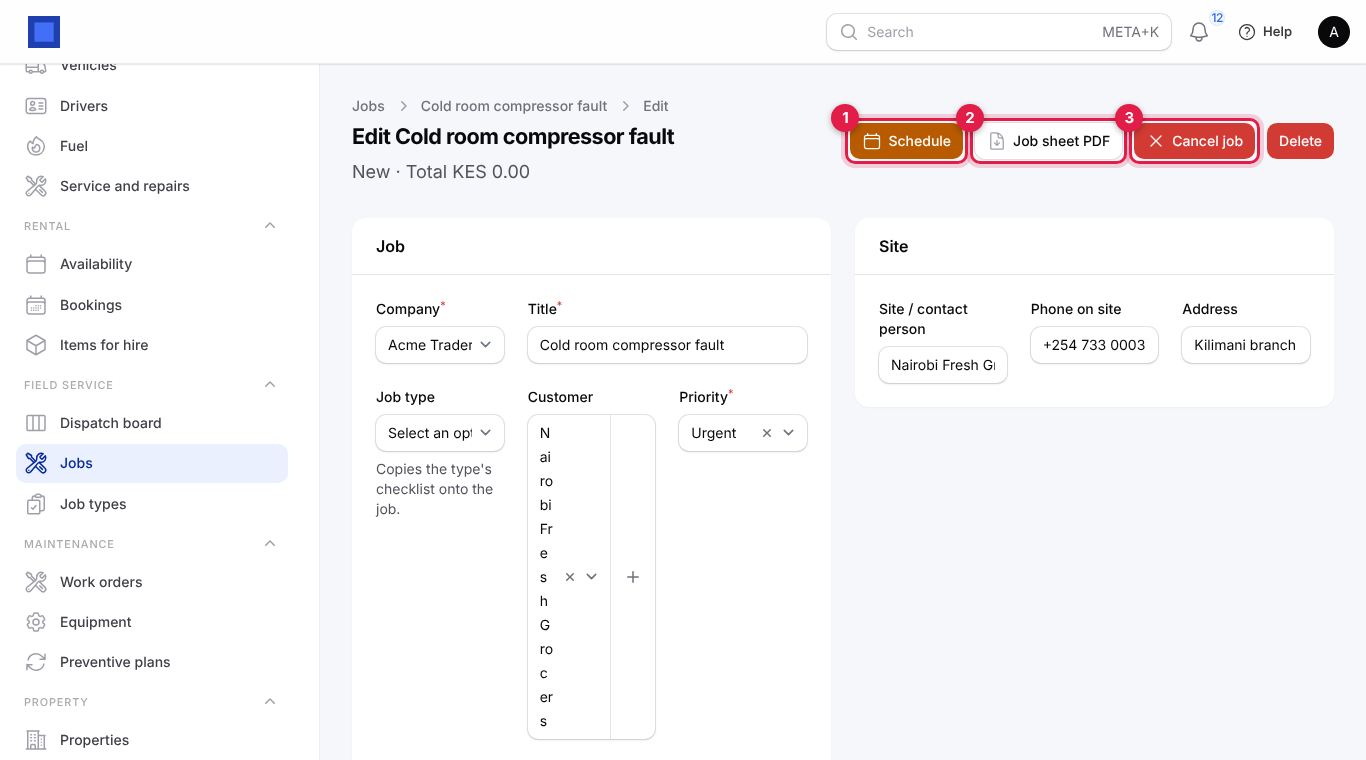
- Click Schedule.
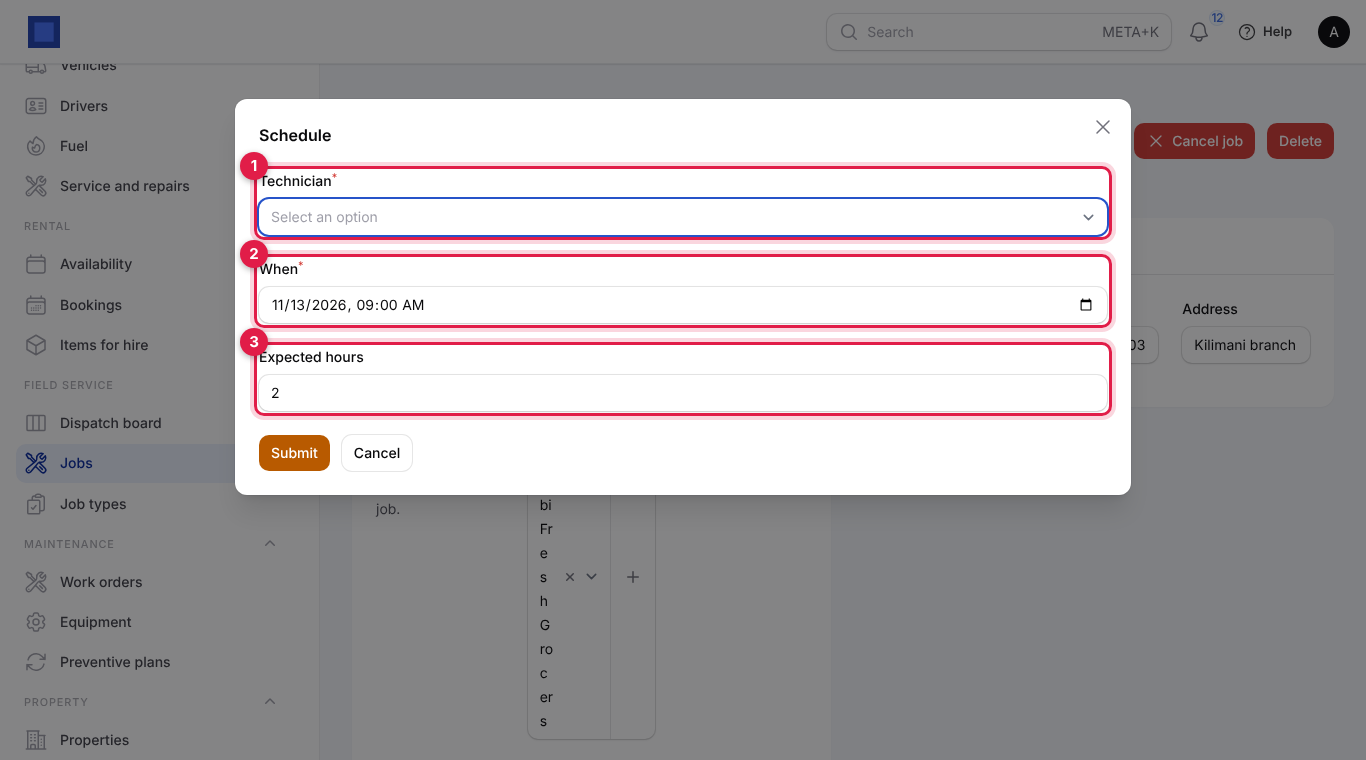
- Pick the Technician (marker 1), When (marker 2) and Expected hours (marker 3), then click Submit. The job is scheduled and dispatched at once: the status becomes Dispatched and the technician gets a notification with the job number, title, time, site and address. Use Schedule again to move it.
On the dispatch board
Field Service → Dispatch board shows one week: a row per technician and a column per day, with today highlighted. Each job card shows its number, time, title and site, coloured by status (grey new, light amber scheduled, amber dispatched, blue in progress), with a red edge when overdue and an amber edge when urgent. Click a job number to open it.
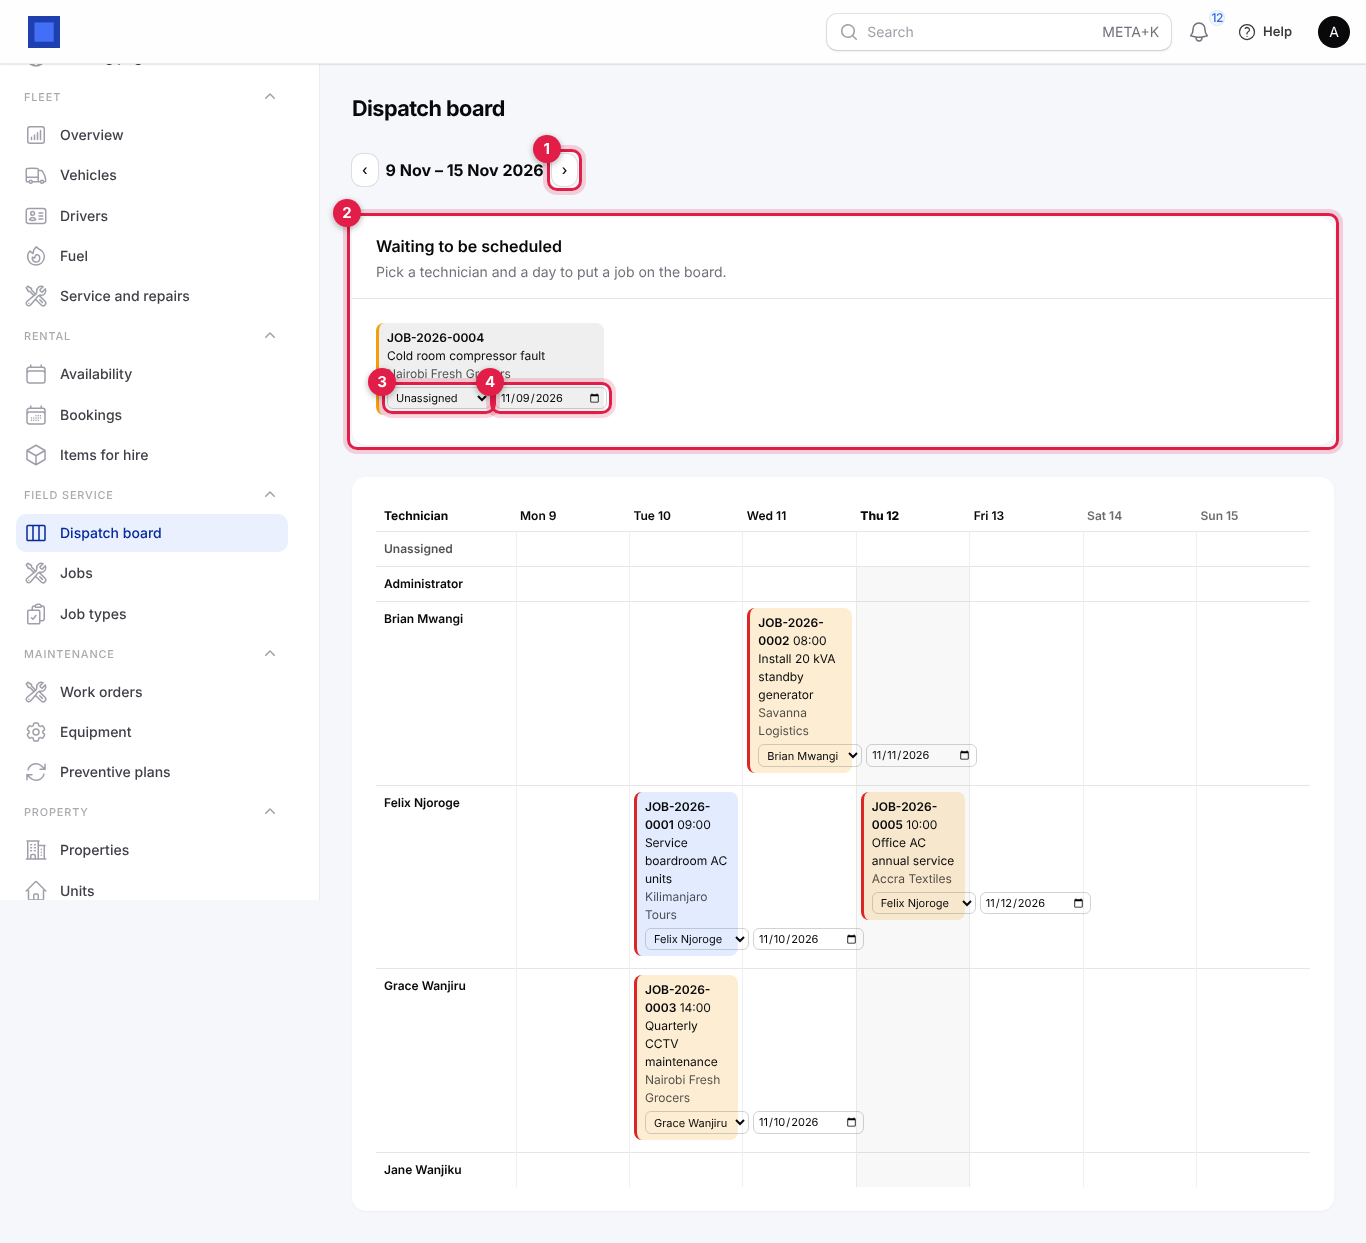
- Move between weeks with ‹ and › (marker 1).
- Jobs without a technician or date are listed under Waiting to be scheduled (marker 2).
- On any card, pick a technician in the list (marker 3) and a day in the date box (marker 4). The job moves to that technician's row and is dispatched, keeping its time of day (09:00 when it had none). Pick Unassigned to take it off a technician (the job stays scheduled for that day). You need fieldservice.dispatch or fieldservice.manage to change the board.
If the board says No technicians yet, give your technicians a role with fieldservice.view under Settings → Roles.
The technician's day: My jobs
Technicians open Me → My jobs on their phone (install the workspace app for one-tap access; see Installing the apps). Each job assigned to them is a card with the number, title, time, customer, status, a map pin with the address and a tap-to-call phone number.
- On arrival, tap Start job (marker 1). The job becomes In progress.
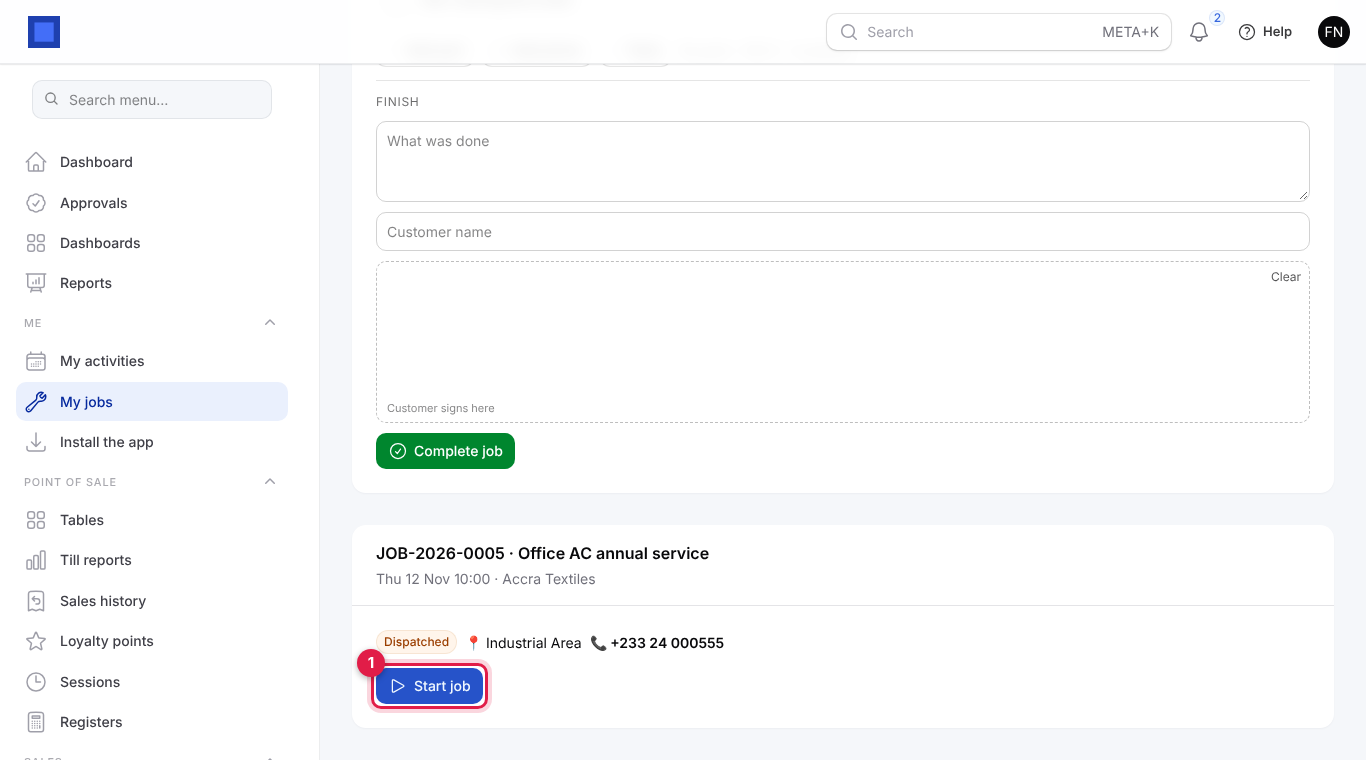
- The card then shows the work tools:
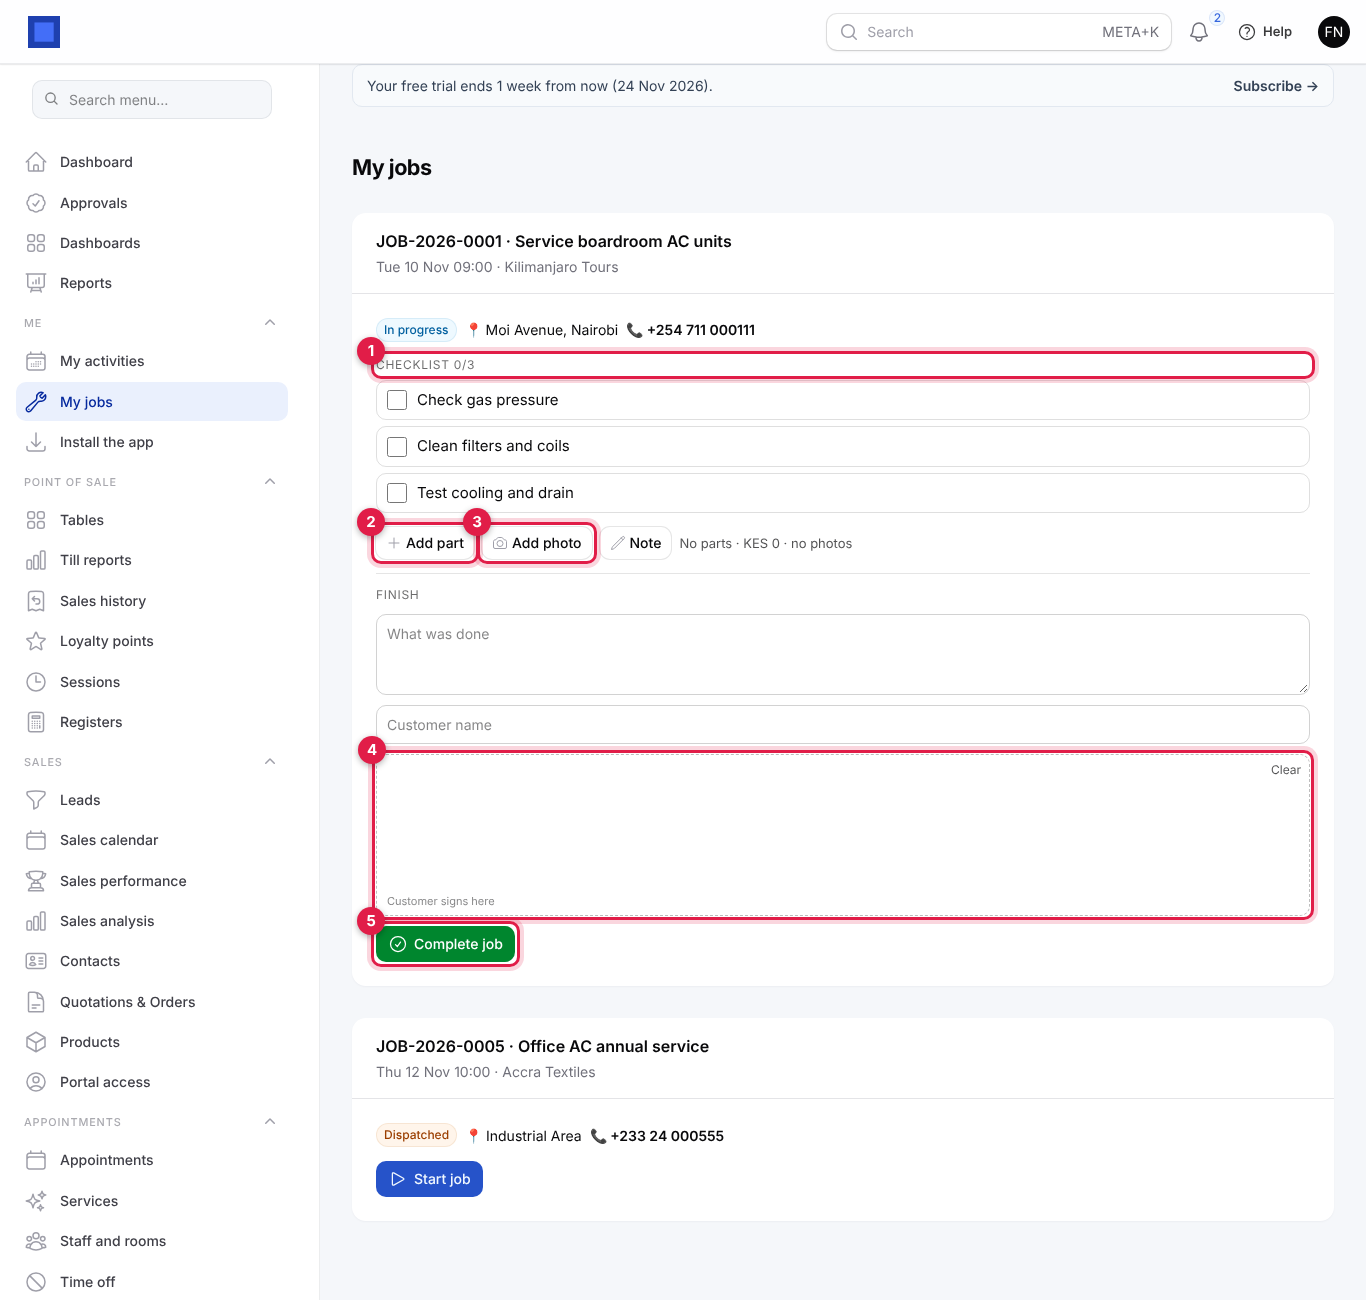
- Checklist (marker 1): tick each step as it is done. The progress (for example 2/3) is visible in the office.
- Add part (marker 2): pick a Product from your catalogue (the description and price fill in) or type a Description, set Quantity and Unit price. Parts go on the invoice.
- Add photo (marker 3): take a photo (before, after, the serial plate) with an optional Caption.
- Note: an internal note for the office.
- Finish: type What was done and the Customer name, have the customer sign in the box (marker 4; Clear to start again), then tap Complete job (marker 5). The job becomes Done and the signature is stored on the job sheet.
Follow and complete a job in the office
An In progress job shows its status, technician, time, checklist progress and total under the title.
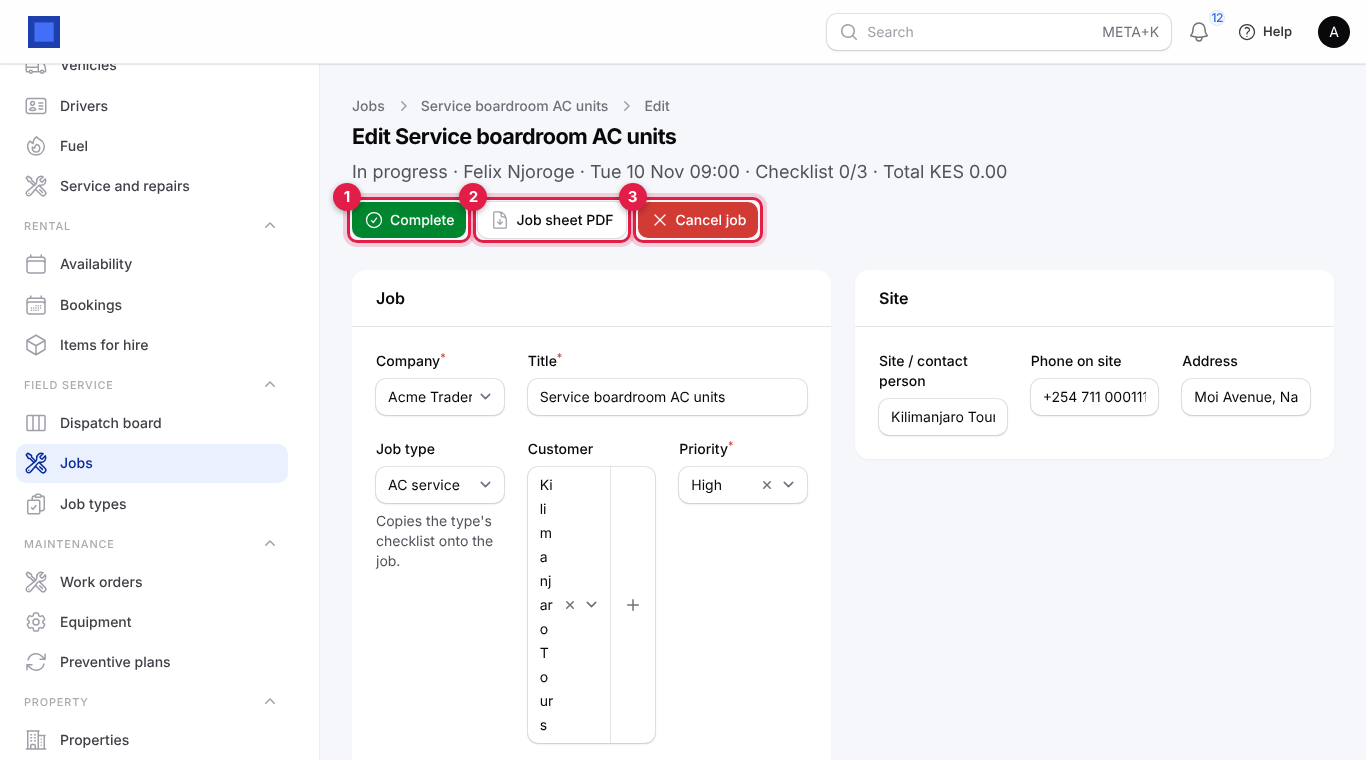
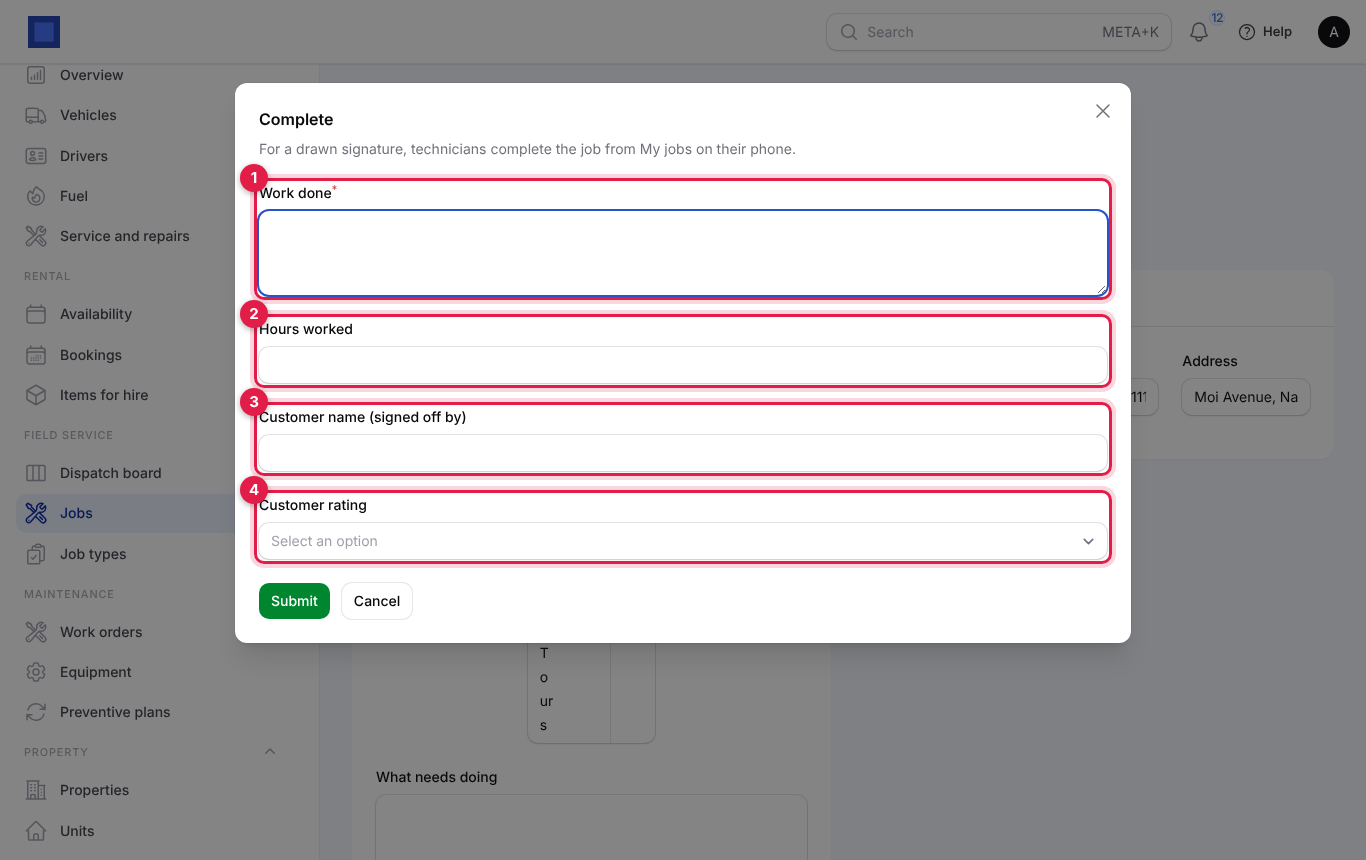
- Complete (marker 1): for a job finished without the phone (for a drawn signature, technicians complete from My jobs).
| Field | What to enter |
|---|---|
| Work done (required, marker 1) | What was done; printed on the job sheet. |
| Hours worked (marker 2) | Labour charged on the invoice: hours × the job's labour rate. |
| Customer name (signed off by) (marker 3) | Who accepted the work. |
| Customer rating (marker 4) | One to five stars. |
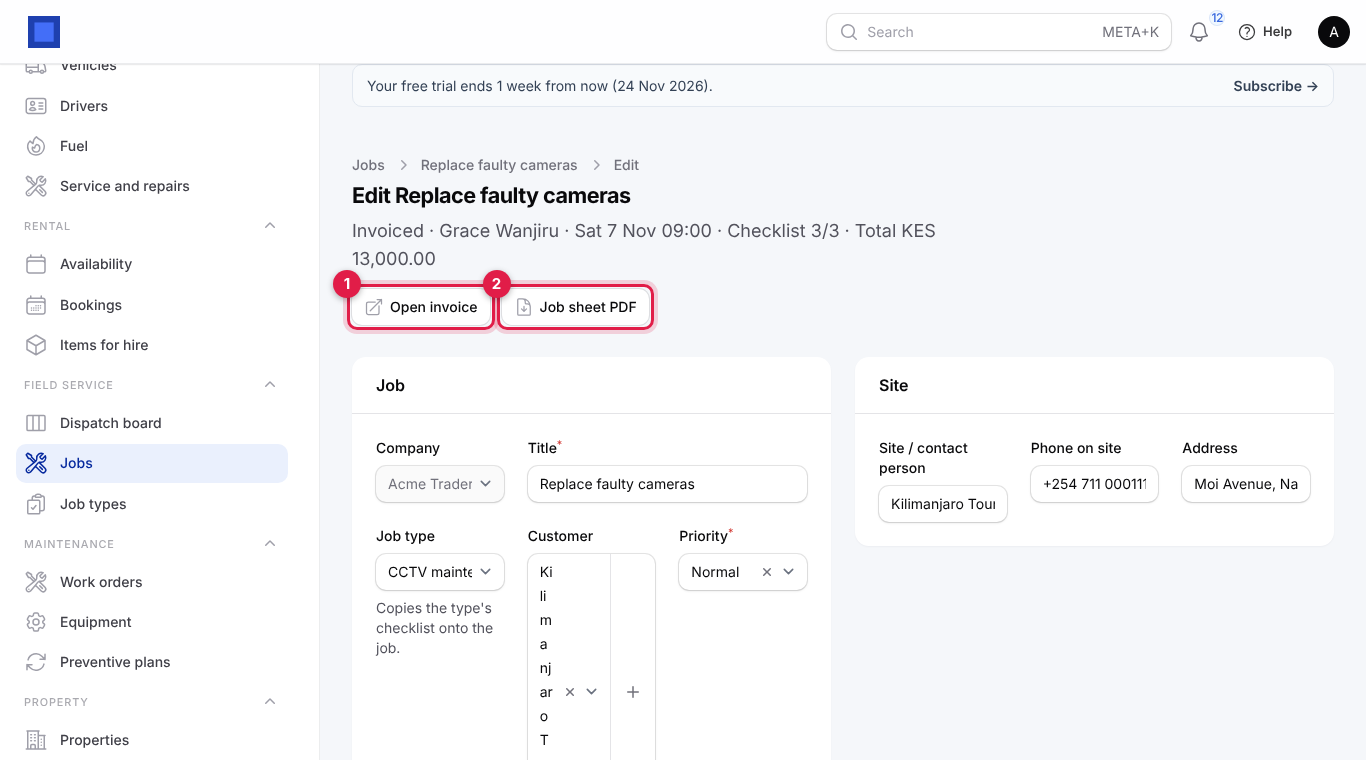
- Job sheet PDF (marker 2): the job sheet with the site, work done, checklist, parts, photos list, labour and the signature, to print or send.
- Cancel job (marker 3): for a job that will not go ahead. Only open jobs can be cancelled.
- Start: appears on a scheduled or dispatched job, to start it from the office.
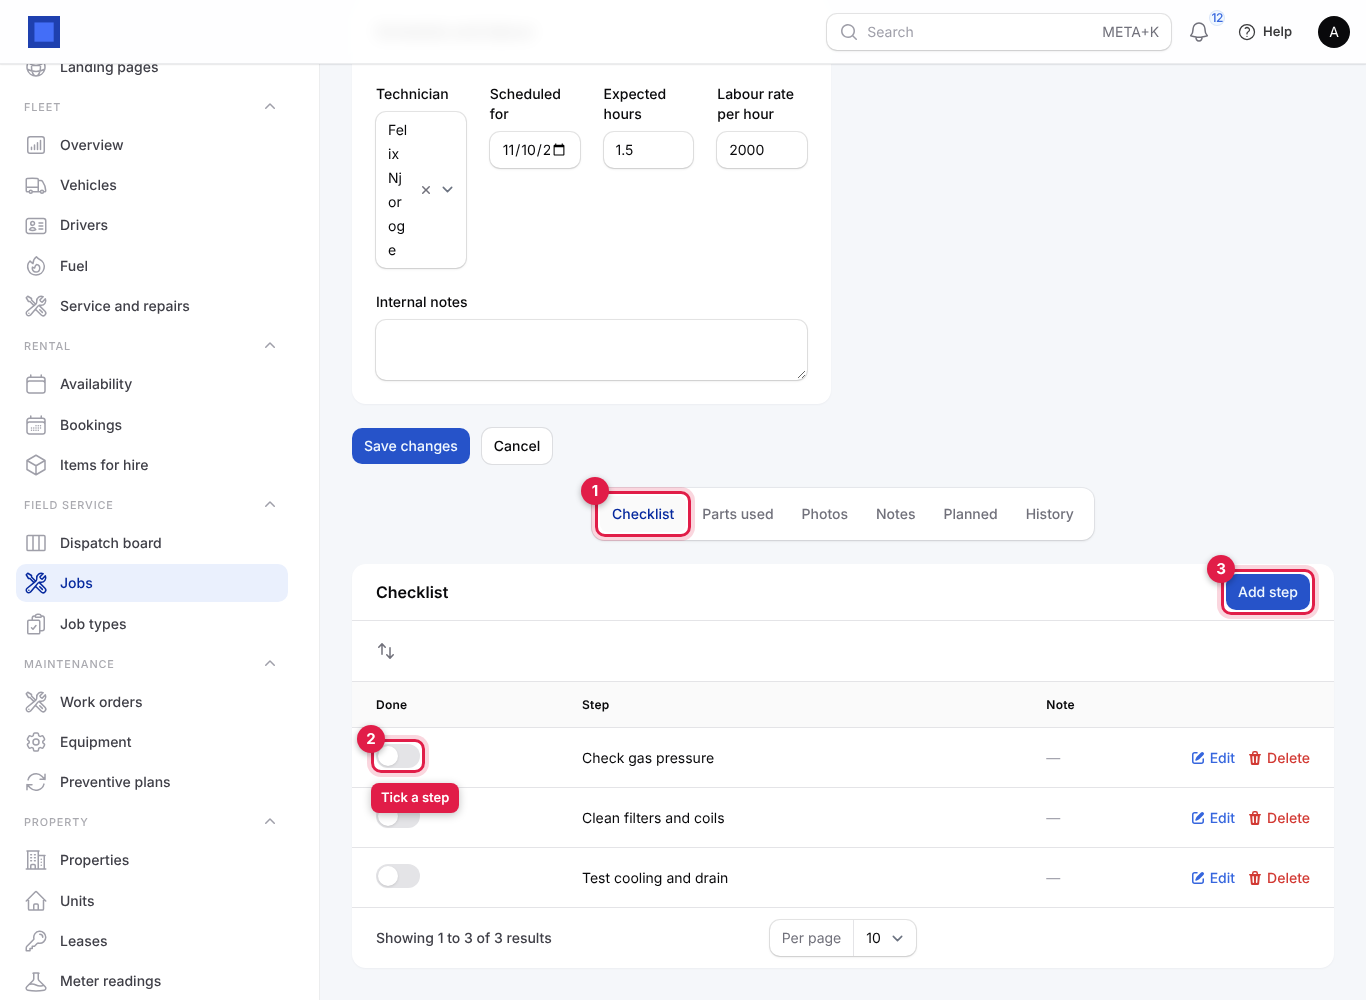
The tabs at the bottom are Checklist (marker 1: tick steps with the switch (marker 2), add steps with Add step (marker 3), reorder them), Parts used, Photos, Notes, Planned and History.
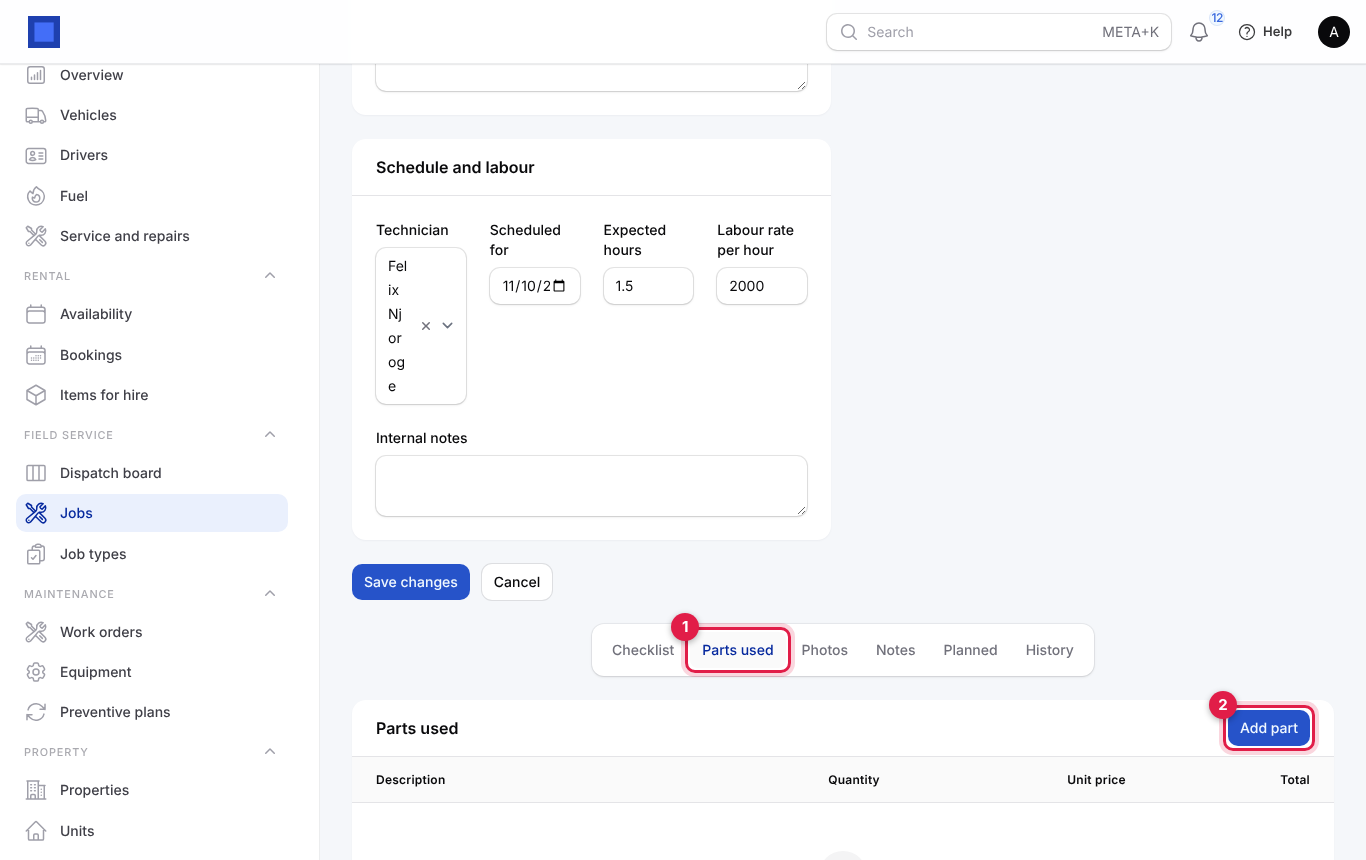
On Parts used (marker 1), click Add part (marker 2) to record a part from the office.
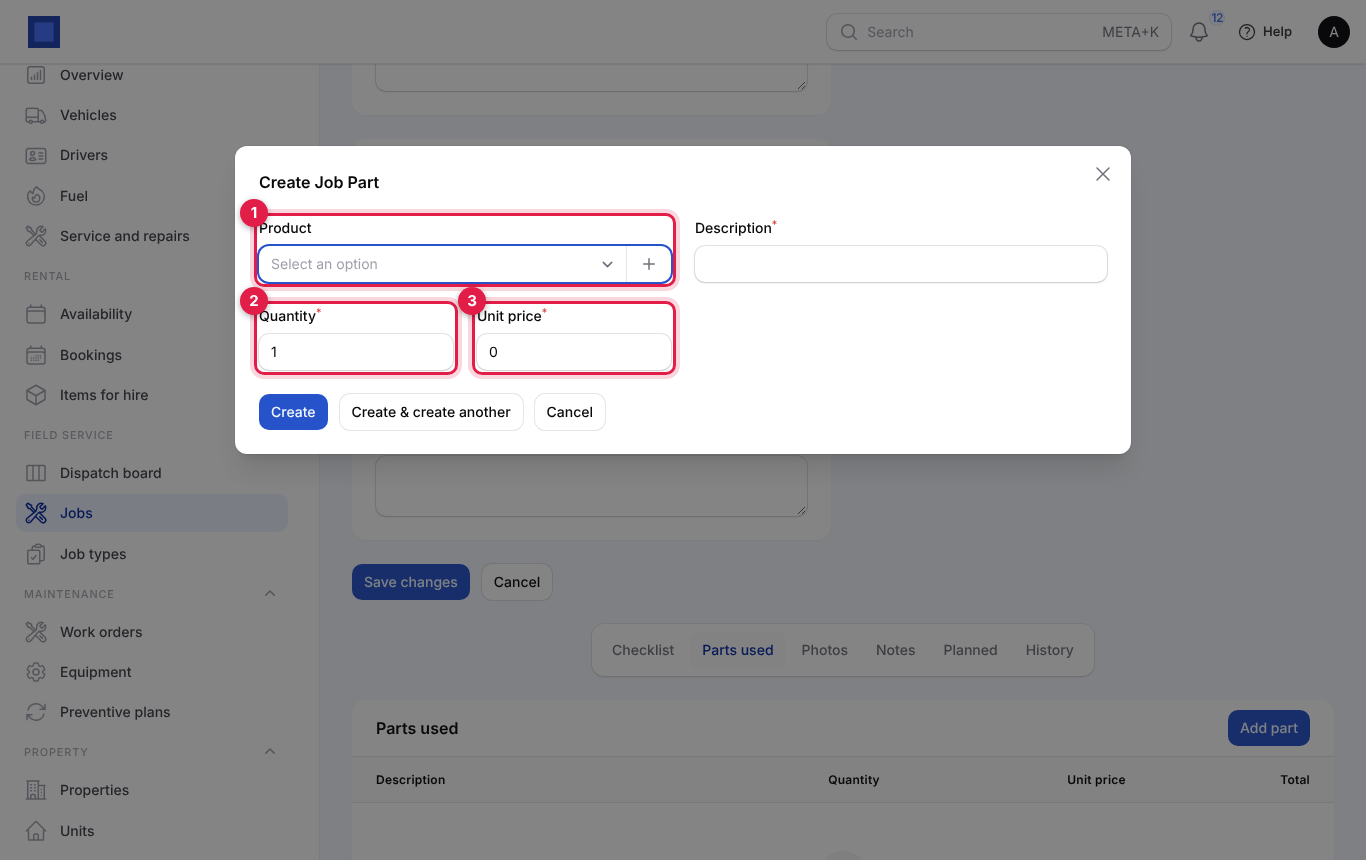
Pick the Product (marker 1; or click + to create one), check the Description, and set the Quantity (marker 2) and Unit price (marker 3). Click Create.
Invoice the job
- Open a Done job and click Invoice, then confirm. The dialog says Labour and parts go on one invoice, issued now.
- An invoice is issued to the job's customer with a labour line (hours × rate) and one line per part, with tax from each product. The job becomes Invoiced and Open invoice (marker 1) takes you to it to send, record payment or share the pay link (see the invoicing pages of this guide).
The job needs a Customer and some labour hours or parts; otherwise you see Pick the customer on the job before invoicing it or Nothing to invoice: add labour hours or parts.
Job statuses: New → Scheduled → Dispatched (technician notified) → In progress (started) → Done (completed, signed) → Invoiced. Cancelled for jobs that will not go ahead.
Common questions
A technician does not appear in the Technician list. Their role needs fieldservice.view.
The technician cannot see the job on My jobs. The job must be assigned to their user and not done or cancelled. Check the Technician field on the job.
Complete job says the signature is needed. A job cannot be completed without the customer's signature is on in Preferences. Have the customer sign in the box on My jobs.
Can the customer get a copy? Download Job sheet PDF and send it, or send the invoice, which the customer can open in the customer portal.
Where do the parts go? Parts are recorded on the job and become lines on its invoice, with the product's tax and sales account.