Menu order and backups
Two settings that keep your workspace tidy and safe. Menu lets you put the sidebar in the order your team works in, give groups names your team knows and hide screens nobody uses, while each person pins the screens they open most. Backup gives the workspace owner a complete copy of the workspace to download, keeps a fresh one every night, and puts everything back from a backup if something goes badly wrong.
You will find them under Settings → Menu and Settings → Backup in the menu.
Note: Both come with every plan. Everyone can open Settings → Menu to pin their own items. Changing the menu for everyone needs the Manage settings permission (the owner and admin roles by default). Settings → Backup is for the owner role only: admins and everyone else do not see it.
Arrange the menu for everyone
- Open Settings → Menu (marker 1). Under Menu for everyone, each group of the sidebar is a bar. Its name shows the new name first and the usual name in brackets, such as Reception (Front desk) (marker 5), and how many of its items are hidden.
- Drag a group by its arrows (marker 2) to move it up or down. The groups show in the sidebar in this order.
- Press a group's bar to open it.
- Type a new name in Name in the menu (marker 3), for example Selling for Sales. Leave it empty to keep the usual name.
- Under Hide these items (marker 4), tick the screens nobody uses. Select all ticks the whole group; a group with every item hidden leaves the menu.
- Press Save menu at the bottom of the page.
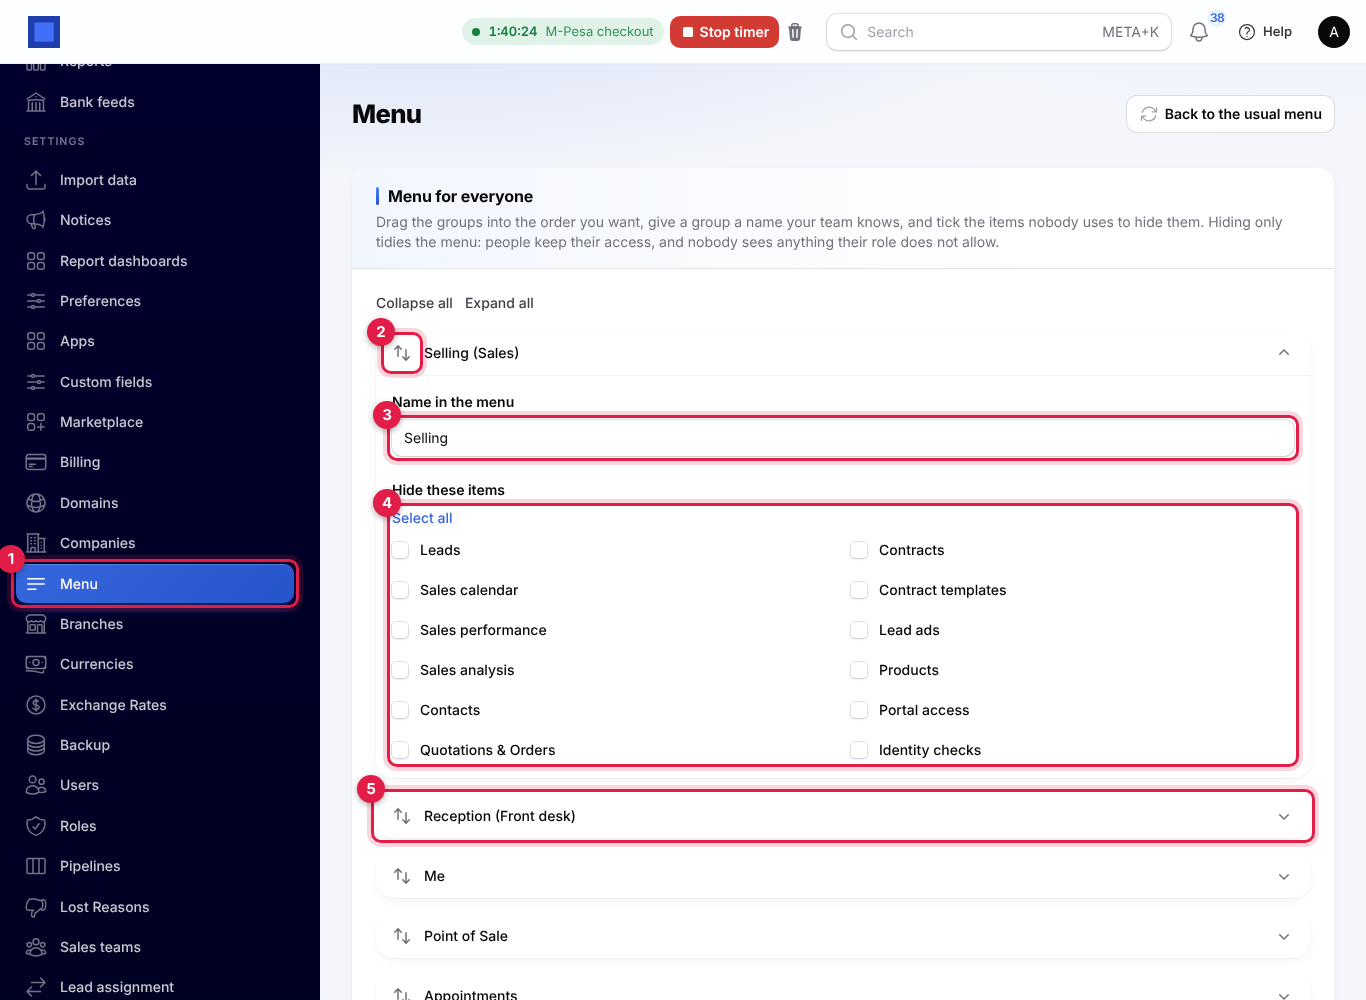
Hiding only tidies the menu. People keep their access: a hidden screen still opens from a link, a search or a bookmark for anyone whose role allows it. And nobody ever sees a screen their role does not allow, whatever the menu says.
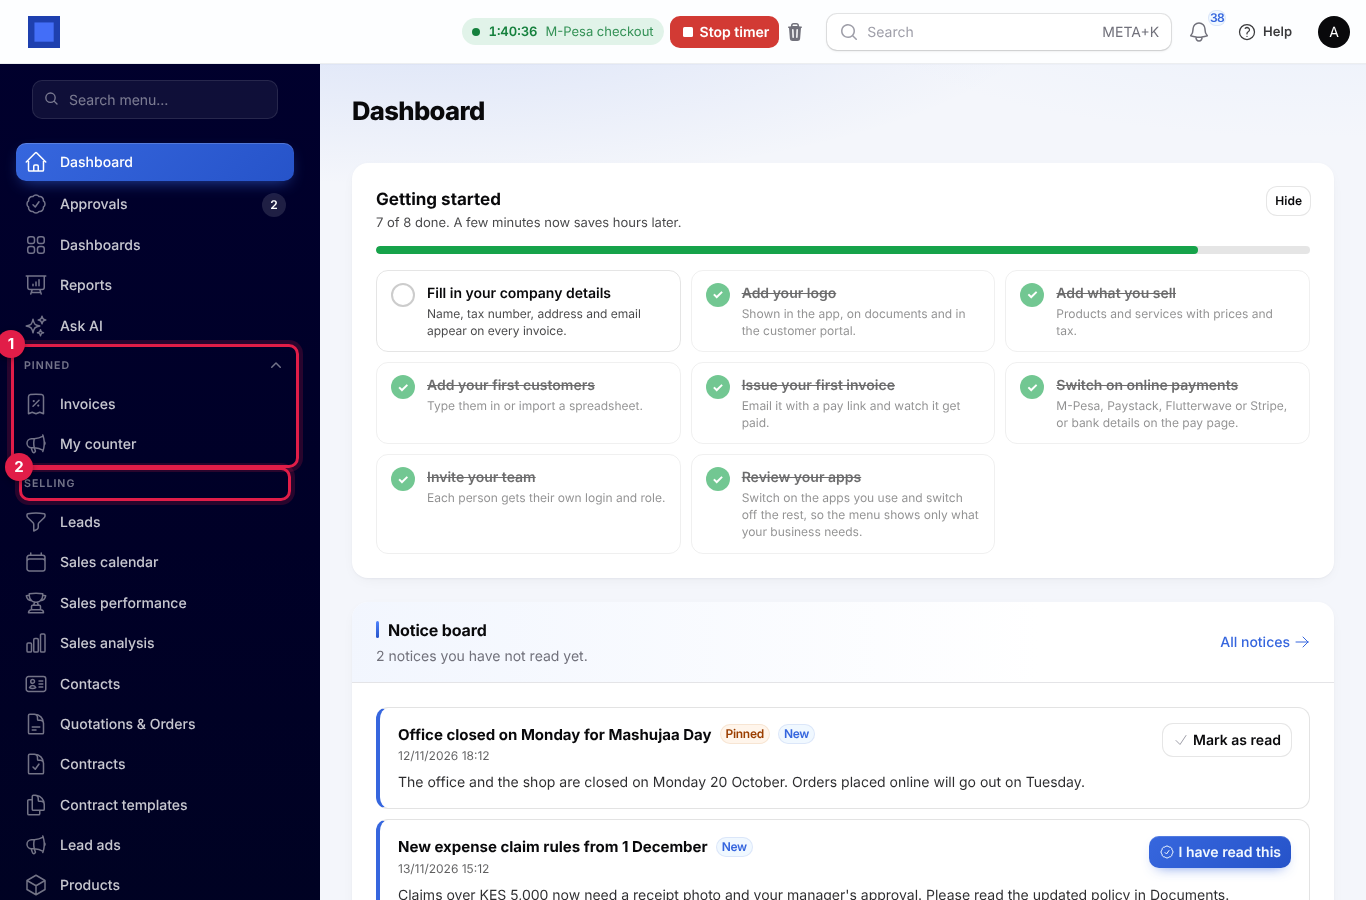
The sidebar then follows your order. Your own pinned items sit at the top under Pinned (marker 1), followed by the groups in your order, with their new names (marker 2).
Pin your own items
Pins are for you alone. Everyone, whatever their role, can pin the screens they open most.
- Open Settings → Menu and go to Your pinned items (marker 1).
- Type in the search box (marker 2) to find a screen. Each one shows as Group › Item.
- Tick the screens you want (marker 3), up to 12.
- Press Save menu (marker 4).
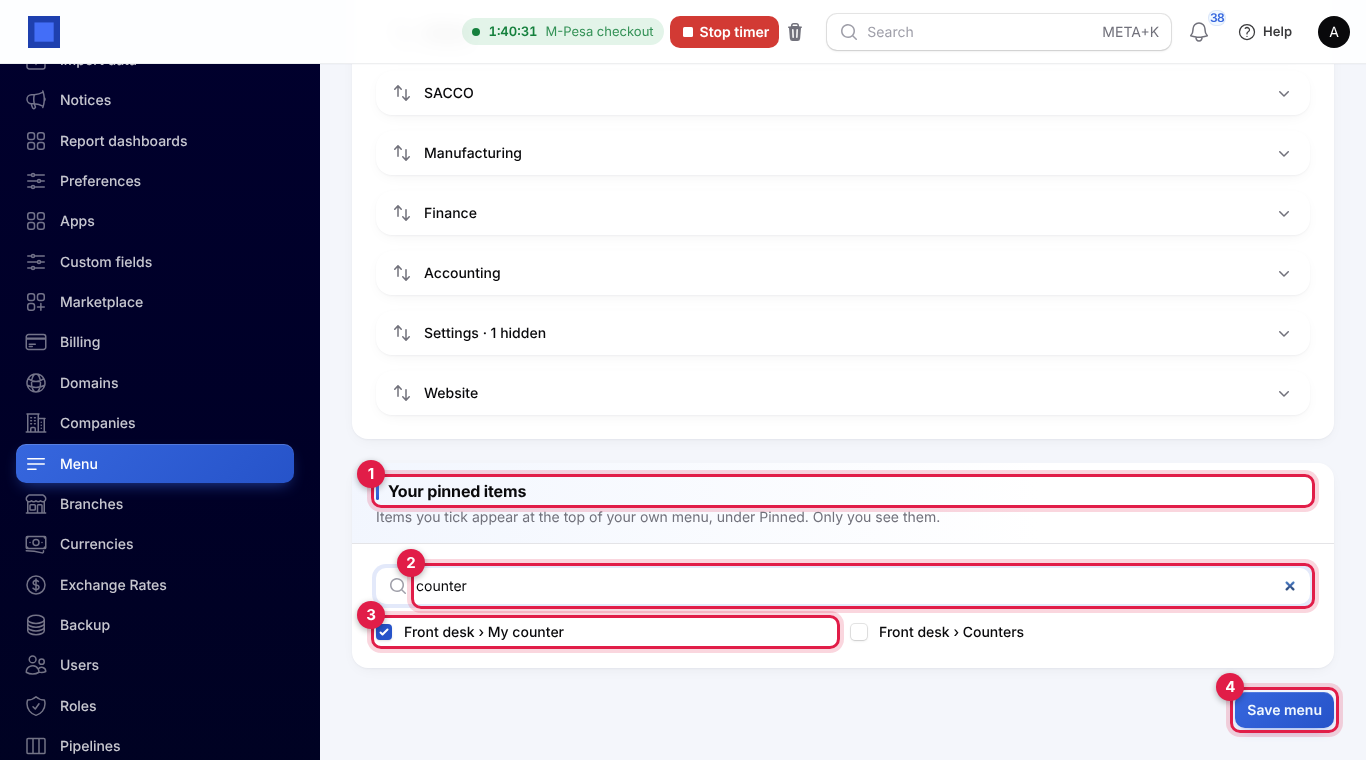
The ticked screens move out of their group into Pinned at the top of your sidebar. Untick them and save to put them back. Only screens you can open are offered.
Go back to the usual menu
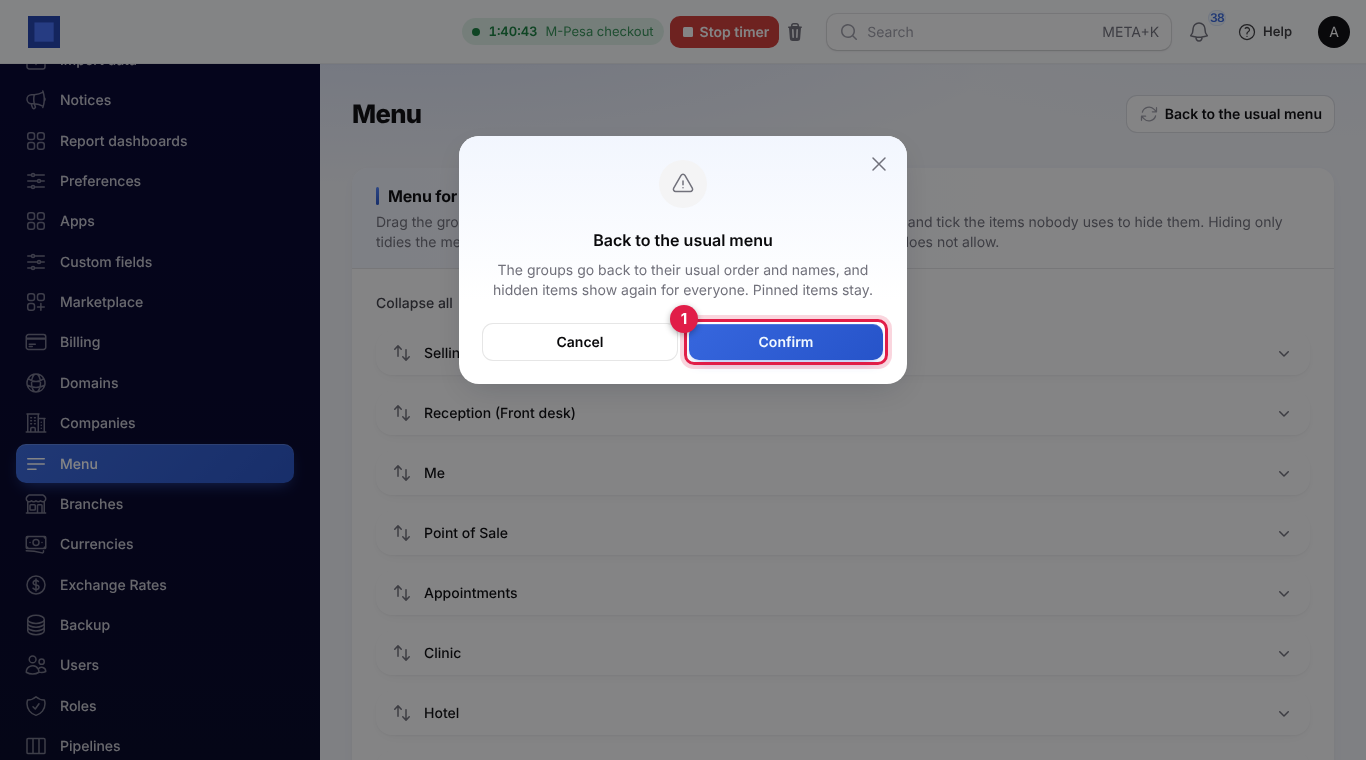
Press Back to the usual menu at the top of Settings → Menu, then Confirm (marker 1). The groups go back to their usual order and names, and hidden items show again for everyone. Everyone's pinned items stay.
What a backup holds
A backup is one ZIP file holding the whole workspace:
- every record in every app;
- every user, role and setting;
- every file uploaded: logos, attachments, scanned bills, signed documents and pictures.
It leaves out:
- personal notes from My notes. They stay private to the person who wrote them, and a restore leaves them as they are;
- the list of backups itself, people's sign-in sessions and work the app has waiting to do in the background.
Each backup is signed by the system and has a check for every part, so a changed or damaged file is spotted before anything is restored.
Make and download a backup
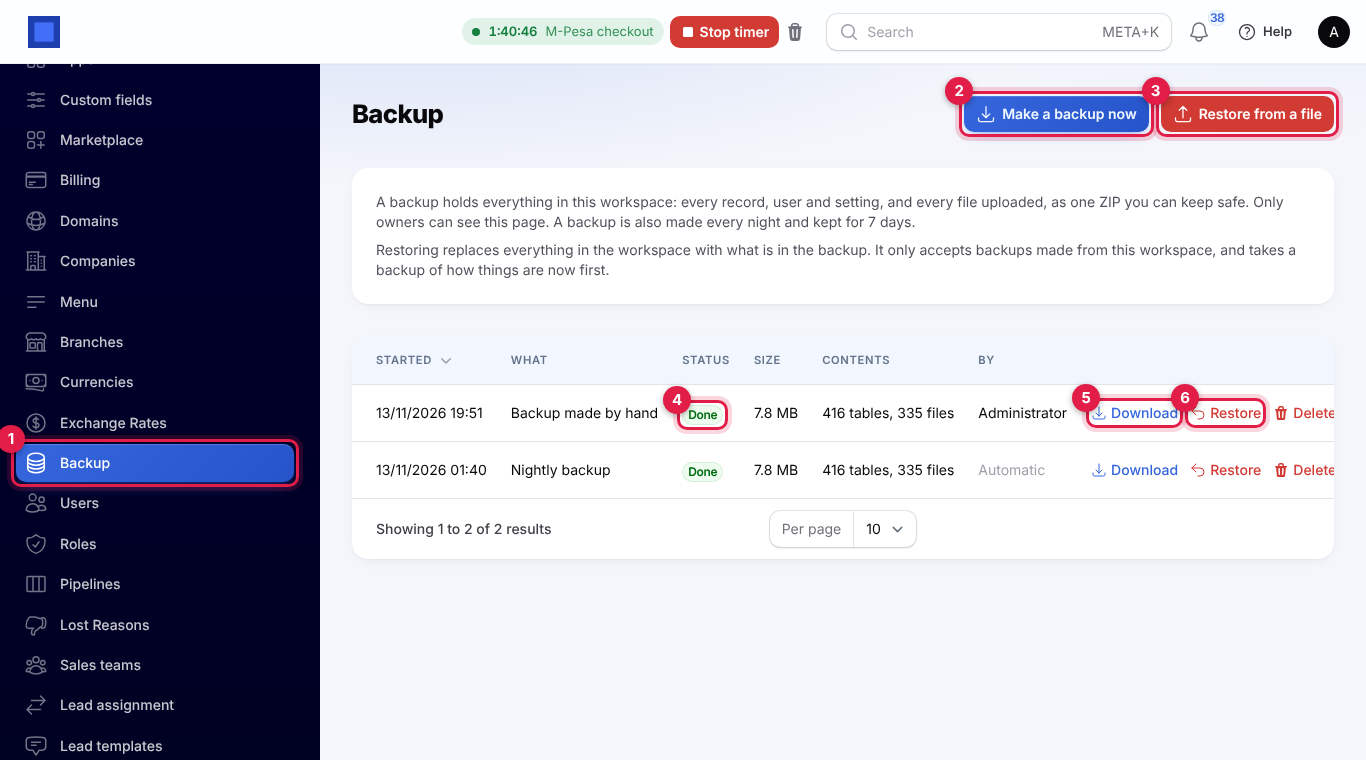
- Open Settings → Backup (marker 1).
- Press Make a backup now (marker 2).
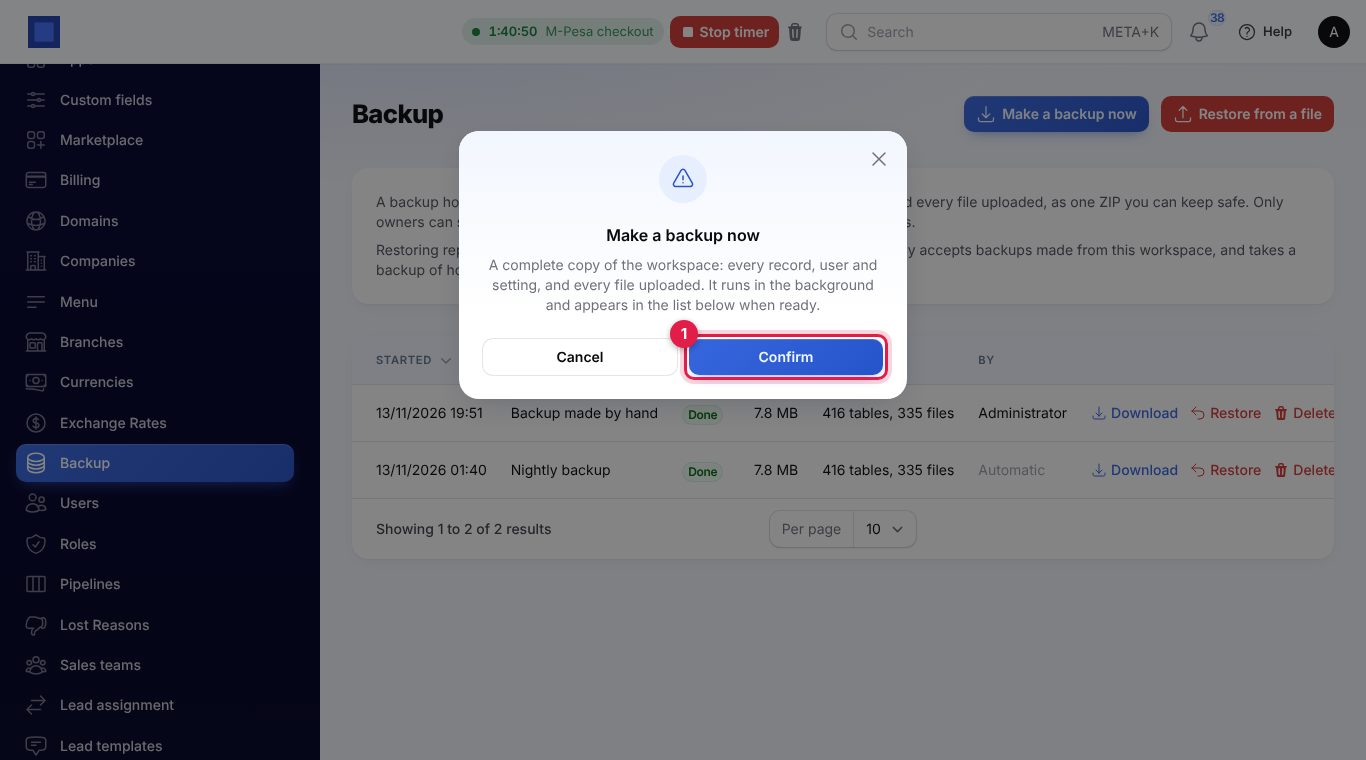
- Press Confirm (marker 1). The backup runs in the background, so you can carry on working.
- The backup appears in the list. Its Status shows Waiting, then how far it has got (for example 40% done), then Done (marker 4). The list updates by itself while a backup or restore is running.
- Press Download (marker 5) to save the ZIP to your computer. Keep it somewhere safe, such as a cloud drive or an external disk: it holds everything, users included.
Each row shows when the backup started, what it is (Backup made by hand, Nightly backup or Taken before a restore), its size, how many tables and files it holds, and who made it (Automatic for the nightly ones). Delete removes a finished backup and its file.
Nightly backups
A backup of every workspace is made automatically each night. The page says how many days nightly backups are kept (7 unless your provider has set something else). Older nightly backups are removed by themselves. If your provider has switched nightly backups off, the page does not mention them.
Backups you made by hand, and those taken before a restore, are not removed: they stay until you delete them.
Restore a backup
Restoring replaces everything in the workspace with what is in the backup: records, users, settings and files. Anything added or changed since the backup was made is lost, unless you go back to the automatic backup described below.
To restore a backup in the list:
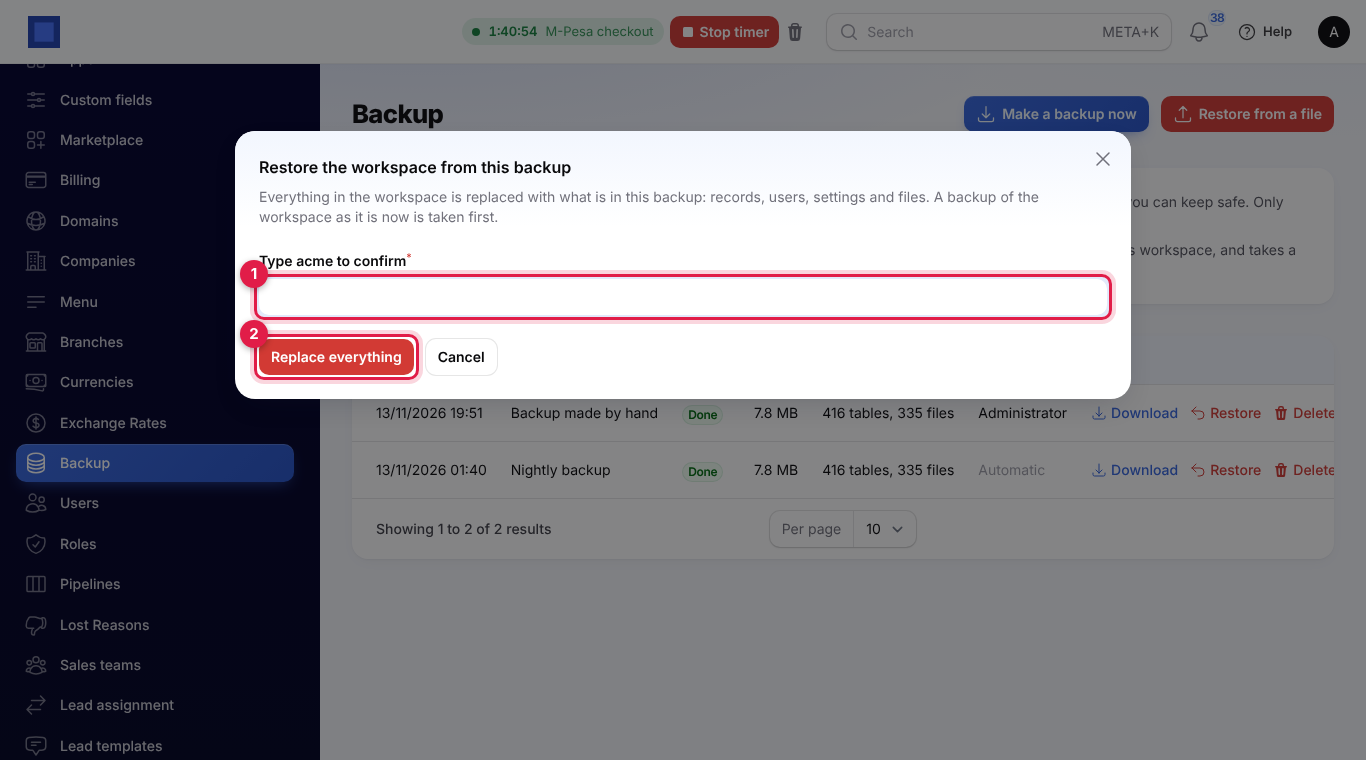
- Press Restore (marker 6 in the list) on its row.
- Type the workspace address shown, for example
acme(marker 1). This stops a restore by mistake. - Press Replace everything (marker 2).
To restore a ZIP you downloaded earlier:
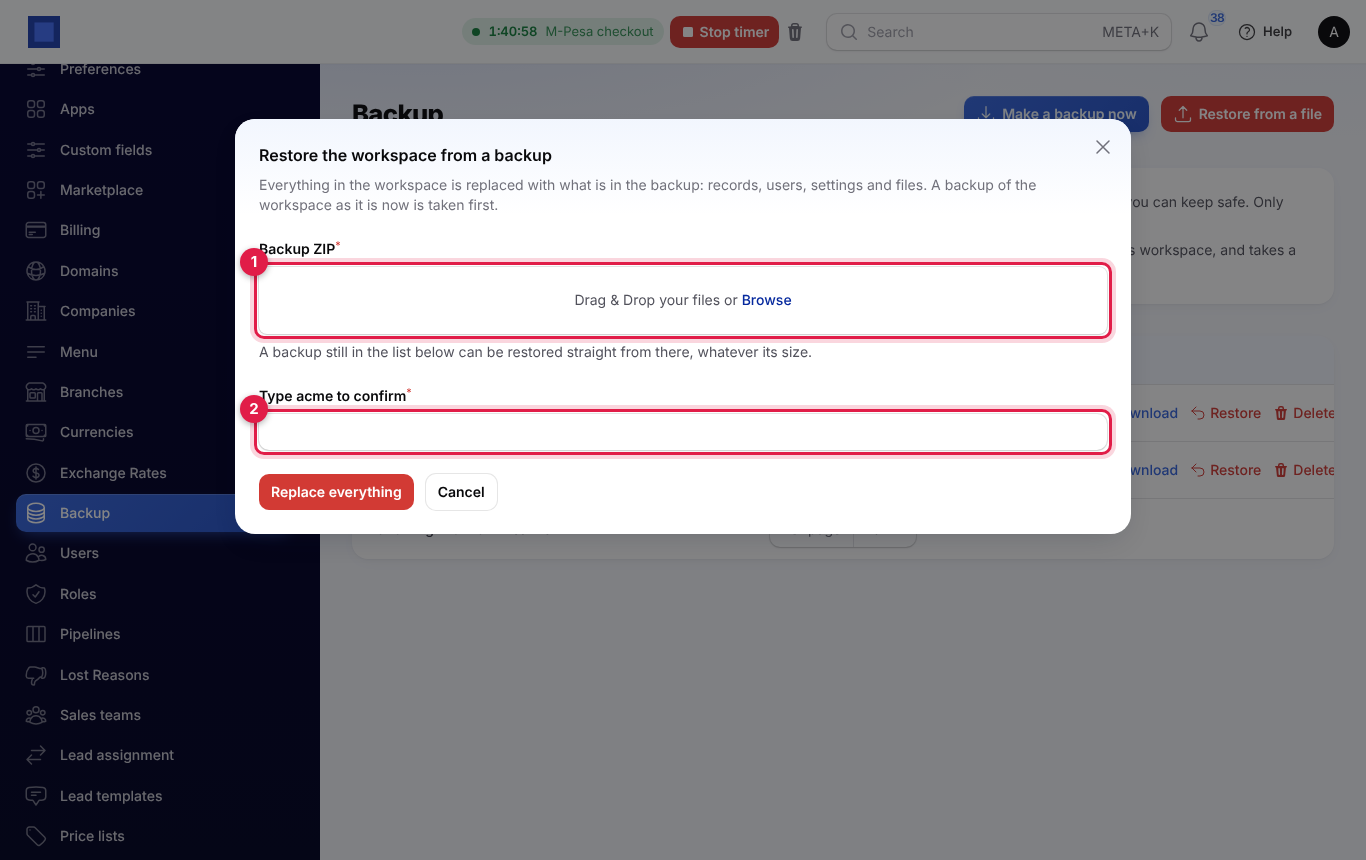
- Press Restore from a file (marker 3 in the list).
- Drop the ZIP on Backup ZIP (marker 1), or press Browse.
- Type the workspace address (marker 2) and press Replace everything.
What happens next:
- A backup of the workspace as it is now is taken first. It shows in the list as Taken before a restore, so you can undo the restore by restoring that one. If this backup fails, the restore stops and nothing is changed.
- The backup is checked, then the records and files are put back. The restore's row shows how far it has got.
- When it is done, the row shows Done, and the owner who started it gets a notification. Everyone may need to sign in again.
If anything goes wrong while the records are being put back, the restore stops and nothing is changed. The row says why.
When a backup is refused
A file is checked before anything is restored. It is refused, with the reason on screen, when:
- it is not a backup ZIP, or has no list of contents;
- it was changed after it was made, or was made by another installation of the app;
- it belongs to another workspace. A backup can only be restored into the workspace it was made from;
- it was made by a newer version of the app, or in a format this version does not read;
- a part of it is damaged or missing, or it holds a file it should not.
A refused upload is deleted straight away, and the refusal is written to the activity log.
Good to know
- Who can do what: only owners make, download, restore and delete backups. Arranging the menu for everyone needs Manage settings; pins are for everyone.
- One restore at a time. While a restore runs, another one cannot start.
- Limits per workspace: 5 backups made by hand, 3 restores and 20 downloads an hour. Past that, you are asked to wait and told how many minutes are left.
- Upload size: a file you upload must fit the largest upload the system allows (25 MB unless your provider has changed it). A backup still in the list can be restored from there whatever its size.
- Activity log: making, downloading, restoring, refusing and deleting backups, and changing or resetting the menu, are all written to the workspace's activity log.
- Menu names hold in every language: a group's new name shows as you typed it, whatever language each person uses.
- What cannot be hidden: the Dashboard, Settings → Menu itself and the Switched off group of apps you have switched off. That group always stays at the end.